 FieldCamp
Job Tray & Dispatch | FieldCamp
Dispatch jobs from the Job Tray using drag-and-drop. Assign technicians, resolve conflicts, bulk reassign, and use AI suggestions to optimize your day.
Under the hood — see how Visits work in the FieldCamp data model: the fields they hold, how they connect to your other records, and how to customize them.
The Job Tray and dispatch workflow is how you turn unassigned work into scheduled, dispatched visits. Every morning, your job is the same: look at what needs to go out, figure out who should do it, and get it on the calendar. FieldCamp's dispatch tools — the Job Tray, drag-and-drop scheduling, conflict detection, and AI suggestions — make that process fast and visual.
This guide walks through the complete dispatch workflow, from the Job Tray at the bottom of the calendar to the moment a technician gets their assignment.
Start with the Command Centre
Open the Command Centre with Cmd+/ (Mac) or Ctrl+/ (Windows) and dispatch with plain language:
- "Assign the Henderson job to Mike" — assign a specific job to a technician
- "Move all of Carlos's jobs to Susan" — bulk reassign when someone calls in sick
- "What's unassigned for today?" — see everything in the Job Tray that needs dispatching
- "Schedule the AC repair for tomorrow at 10am with David" — create and assign in one step
- "Who has the lightest schedule today?" — find the best technician for a new job
The AI handles assignment, conflict checks, and notifications automatically. For everything the Command Centre can do, see the AI Skills guide.
The Job Tray
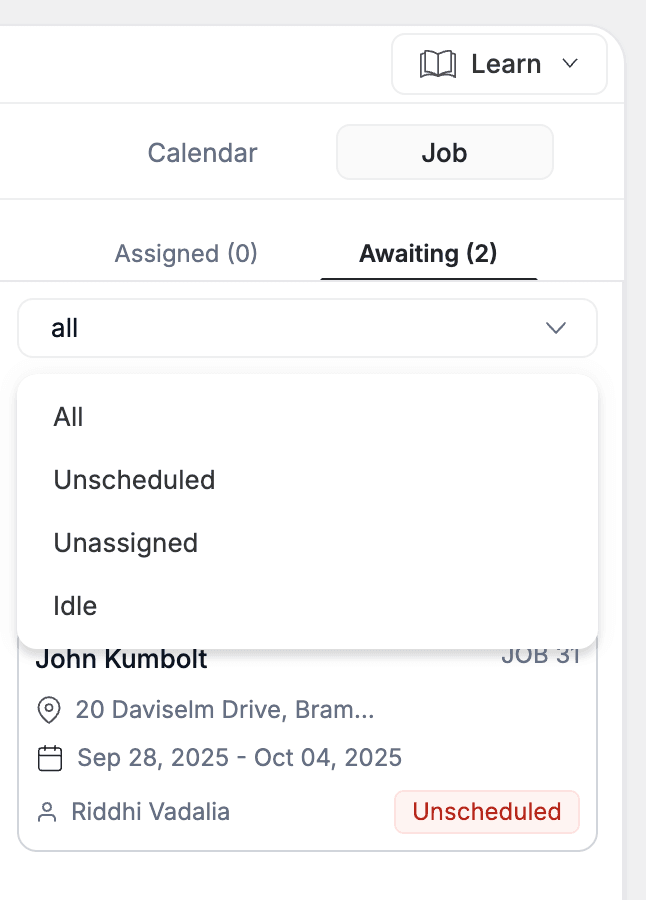
The Job Tray sits at the bottom of the Calendar screen. It holds all work that needs attention — unassigned visits, pending requests, and jobs waiting to be scheduled. Think of it as your dispatch inbox.
Two Modes: Visits and Requests
The Job Tray has two toggles at the top:
Visits mode shows job visits organized by status:
| Tab | What It Shows |
|---|---|
| Unassigned | Visits with no technician assigned — your primary dispatch queue |
| Scheduled | Visits that are assigned and have a time — ready to go |
| In Progress | Visits currently being worked on in the field |
| Completed | Finished visits |
| On Hold | Visits paused for parts, customer availability, or other reasons |
| Alerts | Visits with warnings — overdue, missing information, or scheduling conflicts |
| Cancelled | Visits that were cancelled |
Requests mode shows incoming service requests:
| Tab | What It Shows |
|---|---|
| New Request | Requests that just came in and haven't been reviewed |
| Unscheduled | Requests accepted but not yet turned into scheduled visits |
| Overdue | Requests that have passed their target date without being completed |
Job Cards in the Tray
Each job card in the tray displays:
- Client name and service address
- Job type and description
- Estimated duration (if set)
- Job number (e.g., JOB-71)
- Priority indicator for urgent work
The Dispatch Workflow
Here's the morning routine most dispatchers follow:
Step 1: Open the Timeline View
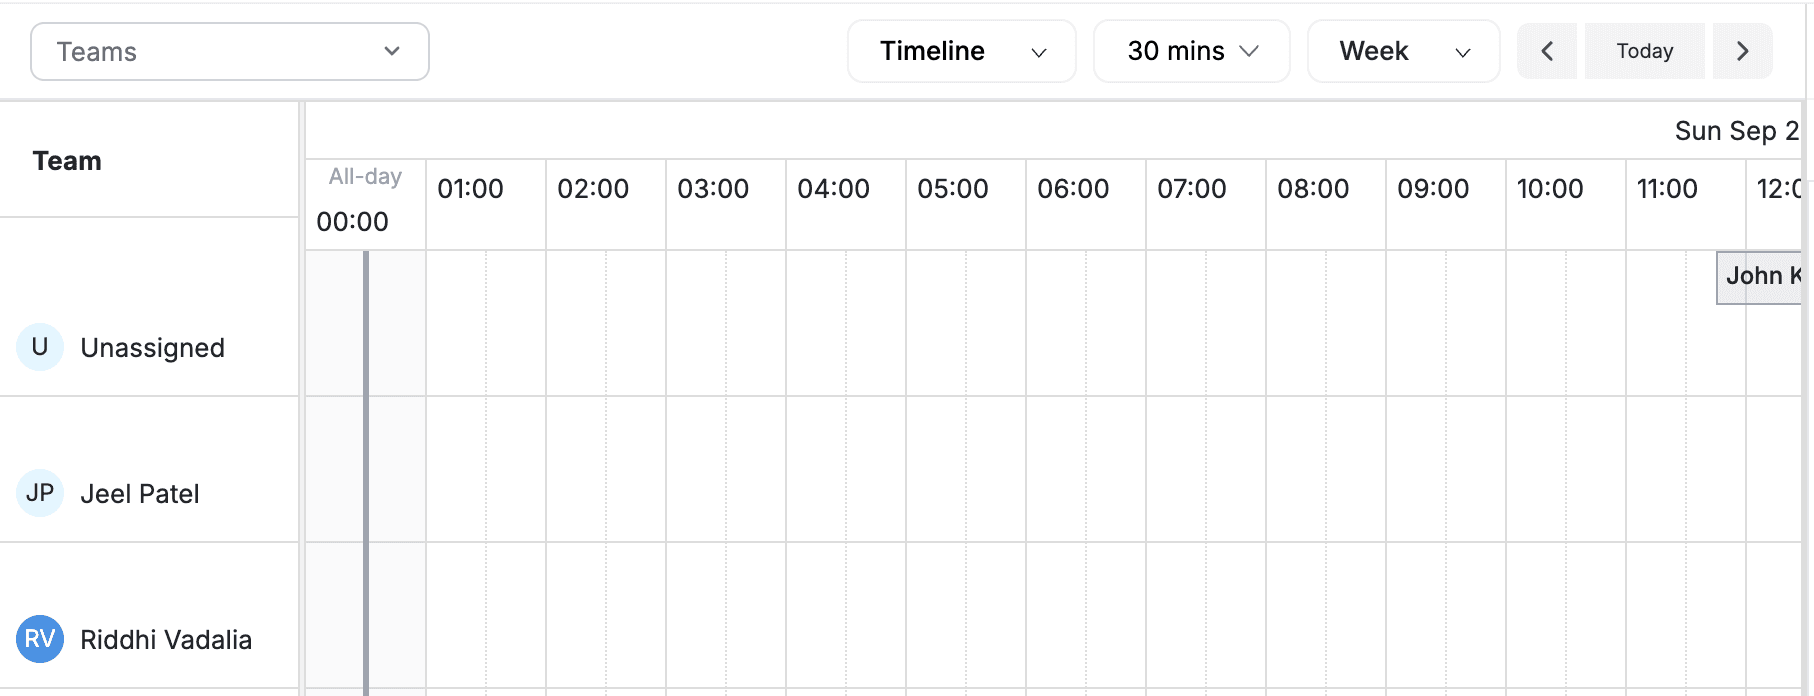
Switch to the Timeline view to see your team's entire day laid out horizontally. Each technician gets a swim lane — you can instantly see who's booked, who has gaps, and where there's room for more work.
Step 2: Check the Job Tray for Unassigned Work
Look at the Unassigned tab in the Job Tray. This is your dispatch queue — everything here needs a technician and a time.
Step 3: Drag Jobs to the Right Technician and Time
Click and hold a job card from the tray, then drag it onto the calendar grid. Drop it on the technician's row at the time you want the visit to start.
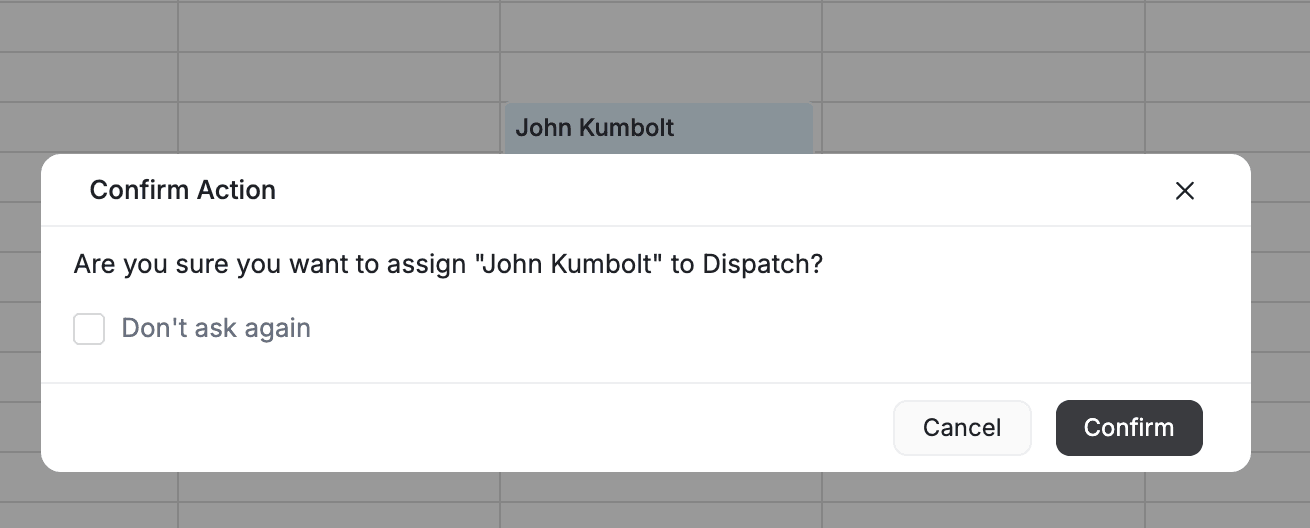
When you drop a job, a confirmation modal appears showing:
- The assigned technician
- The scheduled time
- Any conflicts with existing visits
- Estimated drive time from their previous job
Step 4: Confirm the Assignment
Review the details in the modal and confirm. The job moves from the tray to the calendar, and the technician receives a notification on their mobile app.
You can also assign jobs in two stages. First drag to a technician's all-day section (assigns the person but not the time), then later drag from the all-day section to a specific time slot.
AI Dispatch Suggestions
When the AI Dispatcher proposes assignments, the proposals appear directly on the calendar as ghost chips — dashed-outline cards with a ✨ prefix on the suggested technician's row. A ghost is a proposal, not booked work: nothing is committed until you act on it.
You review suggestions in the AI Review panel on the right side of the calendar. Open it by:
- clicking the suggested pill in the day summary strip (reviews every waiting suggestion, grouped by technician), or
- clicking a ghost chip or a technician's ✨ badge (reviews just that technician's suggestions).
In the panel, accept or decline each proposal individually, or use Accept all / Decline all — both go through a confirmation step, so a stray click never bulk-commits your schedule.
Conflict Detection
FieldCamp evaluates every drag against three rules — live, while you drag. A small tooltip follows your cursor and updates in real time:
- Overlap (blocking) — the technician already has a visit at that time. The drop is blocked; no modal, no override.
- Outside business hours (warning) — the slot falls outside your configured working hours. You can confirm and proceed.
- Outside service area (warning) — the visit's address falls outside all of your service areas. You can confirm and proceed; the chip then carries the red out-of-zone corner dot described in Reading the Visit Chips.
Warnings open a confirm dialog before the move is saved, so overrides are always deliberate.
Tech Peek: check a technician at a glance
Clicking a technician's name in Timeline or Resource view no longer navigates you away from the calendar. It opens Tech Peek, a read-first panel on the right that shows:
- Identity and presence — last-known location and last-seen time (when Live Team Tracking is set up)
- Today's workload — visit count and booked hours
- Next free window — computed from their visits and business hours
- AI suggestions for this technician — jumps into the AI Review panel
- Actions — Mark unavailable (see below) and Open full profile
When a technician is out: Quick Unavailable and Cover Tech
When someone calls in sick, you don't have to open their Team profile:
- Open Tech Peek for the technician and choose Mark unavailable.
- Pick the day and whether it's the full day or specific hours, add a reason, and save.
- If they still have visits that day, the Cover Tech panel opens automatically. For each affected visit it suggests up to three replacement technicians — ranked by skills, availability at that time, proximity, and day load.
- Pick a replacement per visit (or Keep to leave one untouched), then apply. Nothing moves until you click apply.
You can also do this conversationally from the Command Centre: "Move all of Mike's jobs today to Sarah."
Fix this day: resolve double-bookings
When the same technician holds two visits at the same time, open Fix this day from the day summary strip. For every double-booked visit it offers one concrete, availability-checked suggestion:
- Move — the earliest free slot on the same technician that day, or
- Reassign — another technician who is free at the visit's original time (skills-matched and least-loaded), so the time you promised the customer is kept.
Each row has a one-click Apply, or Reschedule to pick a time yourself. After every apply, the remaining suggestions recompute against the new schedule.
Lead holds: reserve a slot before the job exists
A hold reserves time on a technician's row for a lead (a client in your Leads pipeline) before any job is created:
- In Timeline or Resource view, drag-select the time range on the technician's row.
- Choose Hold for lead from the menu, pick the client, and add an optional note.
- The slot renders as a striped band. Holds are soft by design — booking over one shows a warning, but it never blocks real work.
Click a hold band to open its panel, where you can Convert to Job (the job form opens prefilled with the client, time, and technician) or Release the slot.
Rescheduling and Moving Jobs
Jobs already on the calendar can be moved the same way:
- Click and hold a scheduled job block
- Drag it to a new time slot or a different technician's row
- Drop and confirm
The system rechecks for conflicts and updates all affected parties.
Mobile Dispatch
Technicians see their dispatched schedule on the FieldCamp mobile app. When you assign or reassign a job, they get a push notification with the updated details. They can view their daily route, check job details, and update statuses from the field.
Related Articles
Calendar Views | FieldCamp
Use FieldCamp Calendar, Timeline, Resource, and Map views — read every chip indicator, use Find a gap, daily metrics, printing, filters, and keyboard shortcuts.
Route Optimization | FieldCamp
Optimize technician routes, lock routes per team member, preview and apply changes, and review AI dispatch decisions from FieldCamp's calendar.