 FieldCamp
Scheduling Multi-Day Jobs | FieldCamp
Step-by-step guide to enabling multi-day templates, setting up team skills, creating job templates, and scheduling multi-day field service jobs in FieldCamp.
Under the hood — see how Jobs work in the FieldCamp data model: the fields they hold, how they connect to your other records, and how to customize them.
Scheduling multi-day jobs in FieldCamp requires a one-time setup, after which you can schedule complex multi-day projects in seconds. This guide walks you through enabling the add-on, configuring team skills, creating templates, and scheduling your first multi-day job.
Schedule with the Command Centre
The quickest path is through the Command Centre:
- "Schedule a 3-day spray foam job for 123 Oak Street next Monday, assign Spray Crew A"
- "Create a 4-day retrofit project for Smith Residence and let AI find the best crew"
- "Book a 5-day warehouse insulation project at 100 Industrial Blvd, start date next Wednesday"
The AI checks crew skills, availability across all consecutive days, and calendar conflicts before suggesting a slot. See AI Skills for more examples.
Before using multi-day scheduling (via AI or manual), you must complete the one-time setup below. This takes about 15 minutes.
Prerequisites
Before you can schedule multi-day jobs, make sure you have:
| Requirement | Where to Set It | Required? |
|---|---|---|
| Multi-Day Templates add-on | Settings → Add-ons | Yes — multi-day scheduling does not appear without it |
| Team skills configured | Settings → Team Management → each member | Recommended — lets AI match the right crew |
| Job templates created | Settings → Job Templates | Optional but saves significant time |
| Crews/teams set up | Settings → Team Management | Recommended — assign groups instead of individuals |
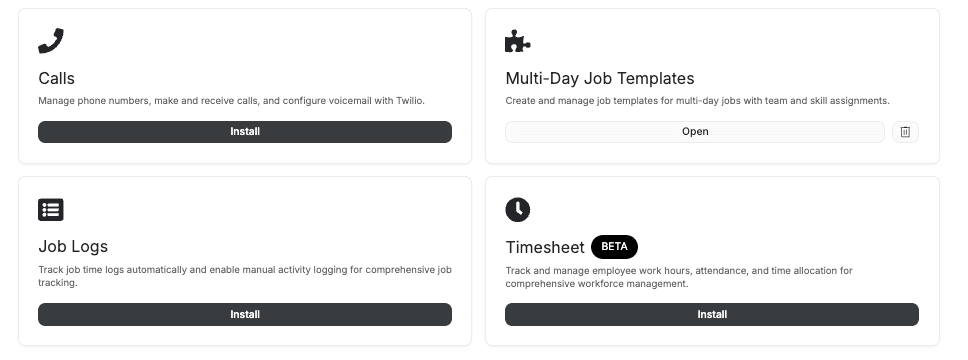
1. Enable the Multi-Day Templates Add-on
Prerequisites: Administrator access and an active FieldCamp subscription.
- Navigate to Settings (bottom left of sidebar)
- Click Add-ons in the settings sidebar
- Find "Multi-Day Templates" in the available add-ons list
- Click Enable and confirm
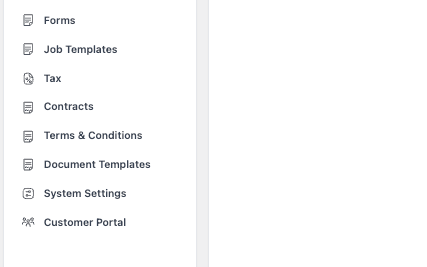
After enabling, a new Job Templates option appears in your Settings sidebar. This is where you will create reusable templates for common multi-day job types.
2. Set Up Team Skills
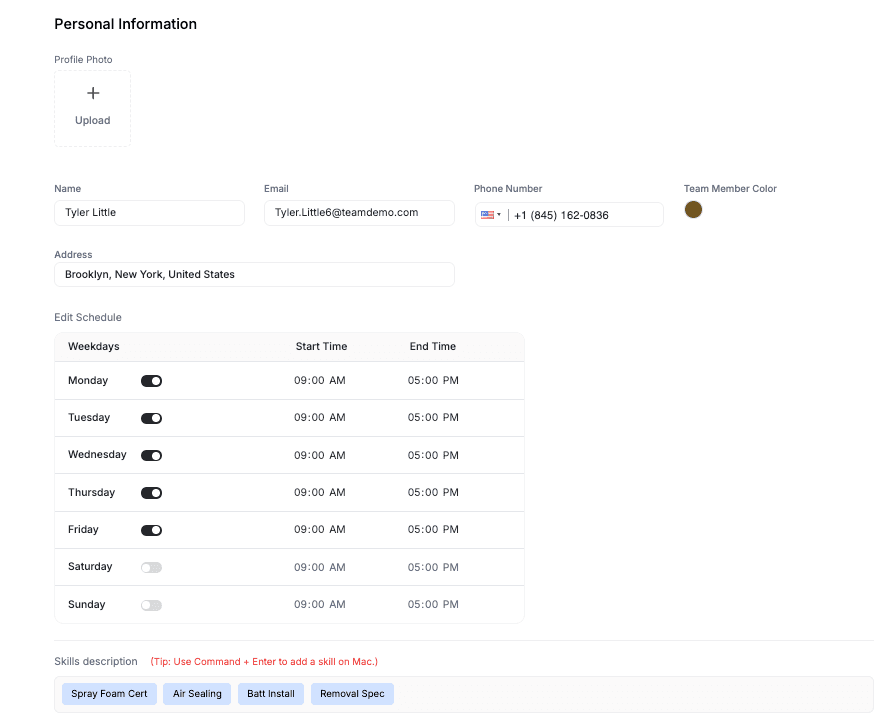
Team skills let the AI scheduling engine match the right crews to your multi-day jobs. Without skills defined, you must remember who can do what. With skills, the system handles it.
- Go to Settings → Team Management
- Select a team member
- Scroll to the Skills section
- Click + Add Skill, select or type the skill name, and save
- Repeat for all team members
Recommended Skills
| Skill Name | Description |
|---|---|
| Spray Foam - Open Cell | Qualified for open cell spray applications |
| Spray Foam - Closed Cell | Qualified for closed cell spray applications |
| Fiber / Blown-In | Operates blown-in fiber insulation equipment |
| Removal & Prep | Insulation removal and surface preparation |
| Lead Installer | Can independently manage and oversee jobs |
| Rig Certified | Certified spray application equipment operator |
Be specific with skill names, add skills to every qualified member, and update them whenever someone completes training. Skills are used by AI scheduling and the AI Dispatcher to filter candidates automatically.
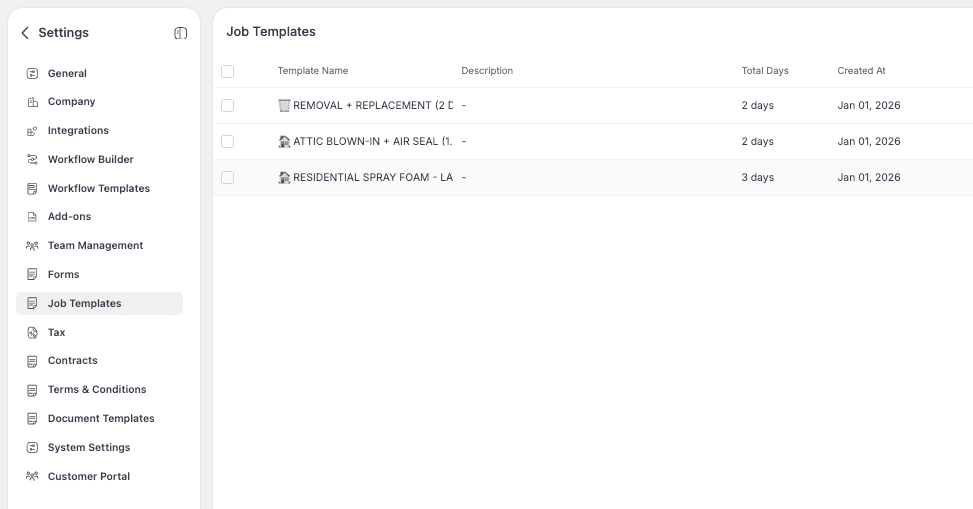
3. Create Job Templates
Job Templates define the structure of your multi-day jobs — how many days, what skills are needed, and what work happens each day. Templates save you from configuring every day manually each time you schedule a similar project.
- Go to Settings → Job Templates
- Click + Create Template
Template Fields
| Field | Description | Example |
|---|---|---|
| Template Name | Descriptive name for this job type | "Full Home Spray Foam (3-Day)" |
| Description | When to use this template | "Homes 2,500+ sq ft, mixed application" |
| Default Duration | Total number of days | 3 days |
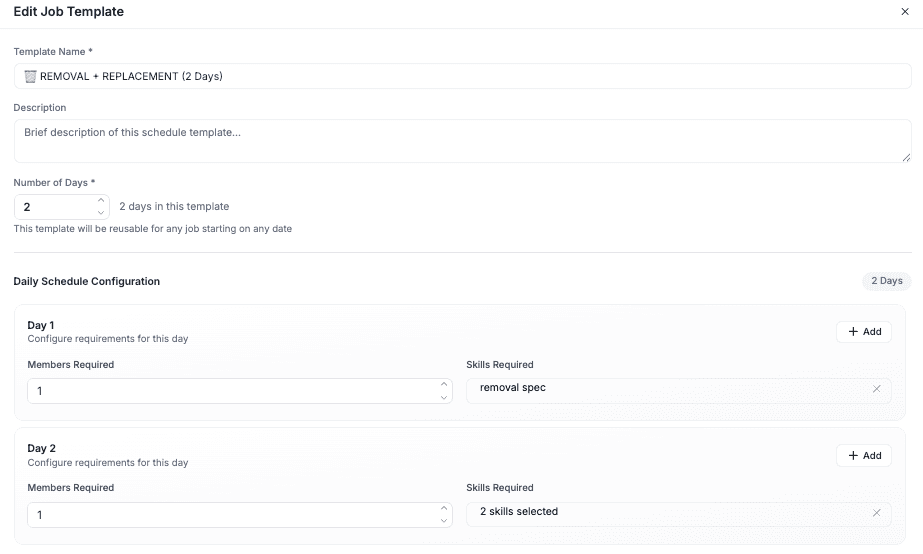
Day-by-Day Configuration
For each day, specify:
| Setting | Purpose | Example (Day 1 of 3) |
|---|---|---|
| Day Label | How this day is referred to | "Prep & Masking" |
| Required Skills | Skills needed for the crew on this day | Spray Foam - Closed Cell, Lead Installer |
Click Save Template when done.
Starter Templates
Here are common templates to get you started:
| Template | Duration | Use Case | Crew Size |
|---|---|---|---|
| Spray Foam - Small Residential | 1 day | Homes under 1,500 sq ft | 2-3 |
| Spray Foam - Standard Residential | 2 days | Homes 1,500-2,500 sq ft | 2-3 |
| Spray Foam - Large Residential | 3 days | Homes 2,500+ sq ft | 3-4 |
| Full Retrofit - Mixed | 4 days | Removal + spray + fiber combo | 4-5 |
| Commercial Spray - Warehouse | 5 days | Large commercial projects | 4-5 |
Start with 3-5 templates covering your most common job types and add more as needed.
Managing Templates
Edit a template — Go to Settings → Job Templates, click on the template name, make changes, and save. Existing jobs created from this template are not affected; only new jobs use the updated template.
Delete a template — Click the delete icon next to the template. Existing jobs created from the template continue to work; the template is simply no longer available for new jobs.
Duplicate a template — If you need a variation (e.g., a 4-day version of your 3-day template), duplicate and modify instead of building from scratch.
Templates are just starting points. When you use a template to create a job, you can still adjust the days, labels, skills, and durations before confirming.
4. Schedule a Multi-Day Job
Step 1: Start a New Job
Navigate to Jobs → click + Add Job → select or search for the client → click Next.
Step 2: Choose Multi-Day Scheduling
Select "Multi-Day Job Scheduling" from the job creation options. This option only appears after enabling the add-on.
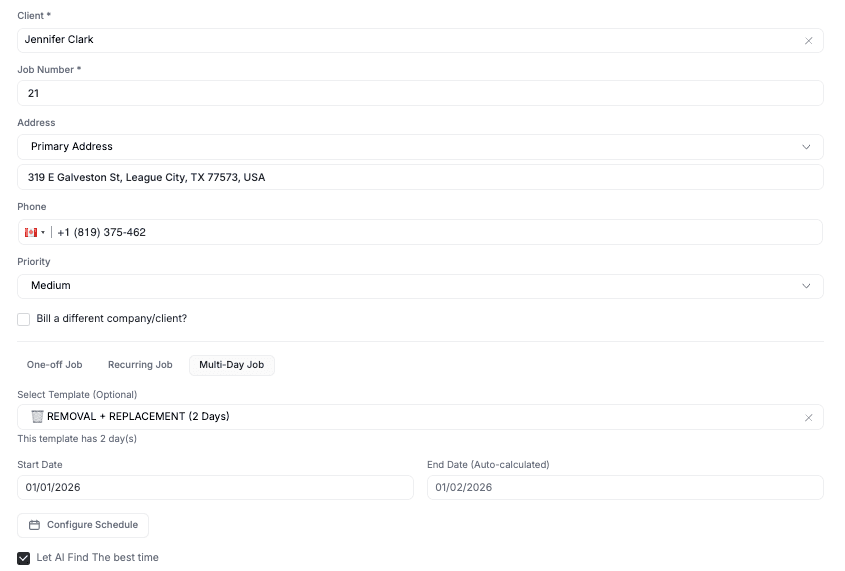
Step 3: Select a Template (or Skip)
If using a template: Choose the template that matches the work. The system populates the job structure automatically — number of days, day labels, and required skills are all pre-filled.
If configuring manually: Skip the template selection. You will add days one by one in the next step.
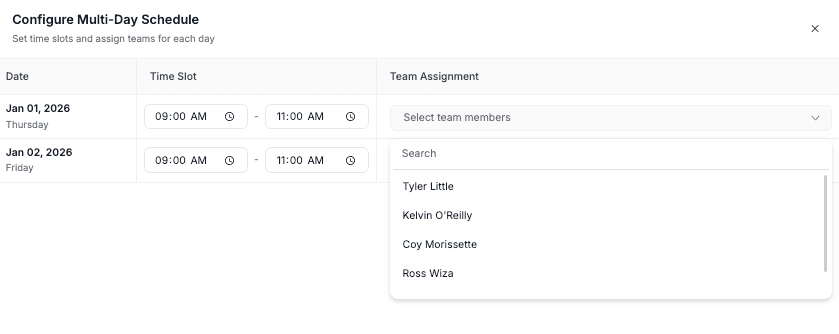
Step 4: Pick a Scheduling Method
Option A: Manual configuration — Use when you already know the crew and dates.
- Click "Manually Select Dates & Crew"
- Pick the start date — the end date calculates automatically based on the number of days
- Select the crew from available team members
- Adjust per-day start times and durations if needed (e.g., Day 1 starts at 7am for 6 hours, Day 2 starts at 8am for 8 hours)
- Review each day's label and skills
- Click Review & Confirm
Option B: Let AI find the best time — Use when you want FieldCamp to optimize.
- Click "Let AI Find the Best Time"
- Set the completion timeline (next 7 days, next 2 weeks, etc.)
- The AI checks crew skills, consecutive-day availability, travel distance, and calendar conflicts
- Review suggested slots ranked by fit quality — the AI explains why each option works
- Select your preferred slot
Step 5: Review and Confirm
Review the full summary:
- Client name and service address
- Start date through end date
- Crew members assigned
- Day-by-day breakdown (labels, times, durations)
- Line items and estimated cost
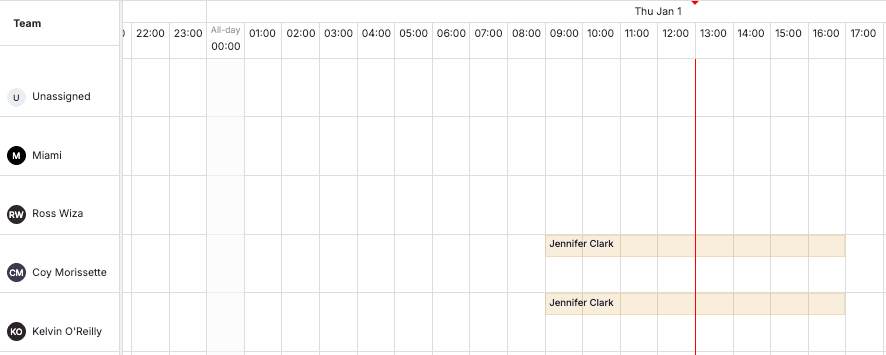
Click Create Job. The job appears on your calendar as a connected block.
After Scheduling
Once the multi-day job is created, here is what happens and how to manage it:
Automatic Actions
- Individual visits are created for each day, each with its own status tracking
- Clients receive automated confirmation if workflow automation is enabled
- The crew is blocked on the calendar for all days — no other jobs can be assigned to them during this period
- The job appears in each crew member's mobile app schedule
Making Changes
Reschedule the entire job — Edit the job and pick new start dates. The whole block moves together. FieldCamp checks crew availability at the new dates and warns you of any conflicts.
Adjust a single day — Open the specific visit from the job's Visits tab and modify its time. For example, push Day 2 back by an hour because materials arrive late.
Change crew — Edit the assignment and all days update automatically. FieldCamp verifies the new crew is available across all days.
Add a day — If the project needs an extra day, edit the job and increase the duration. A new visit is created for the additional day.
Remove a day — If work finishes early, remove the last day. The visit for that day is cancelled.
Swap one crew member — Open the specific visit for the day where the swap is needed and change the assignment. The rest of the days keep the original crew.
Cancellation
Cancel one day — Open the specific visit and cancel it. The other days remain active. Use this when weather or circumstances affect one day but not the whole project.
Cancel the entire job — Cancel the job itself and all associated visits cancel together. The crew's calendar frees up for all days.
FieldCamp verifies crew availability across all days whenever you reschedule. You will see a conflict alert if the crew is booked elsewhere. See conflict detection for resolution options.
Common Scenarios
Scenario 1: Weather Delay
A 3-day roofing job was scheduled Monday through Wednesday. Rain on Tuesday means no work. Options:
- Reschedule the whole job to the following Monday-Wednesday
- Cancel just Tuesday and extend the job by adding Thursday
- Adjust Tuesday's time to start later if rain clears by afternoon
Scenario 2: Crew Member Calls In Sick on Day 2
Mike Torres cannot make it on Day 2 of a 4-day job. Options:
- Swap Mike for another qualified tech on Day 2 only — open Day 2's visit and reassign
- Reschedule Day 2 to when Mike is available (if the work requires him specifically)
- Use the Command Centre: "Who's available tomorrow with Spray Foam - Closed Cell skills?"
Scenario 3: Project Finishes Early
A 5-day commercial project wraps up on Day 4. Open the job and remove Day 5. The visit for Day 5 cancels and the crew is free for other work that day.
Related Articles
Multi-Day Jobs | FieldCamp
Schedule, manage, and track jobs that span multiple consecutive days in FieldCamp with unified crew commitments, calendar blocks, and profitability tracking.
Duplicating & Importing Jobs | FieldCamp
Duplicate existing jobs or import jobs in bulk from CSV and Excel files in FieldCamp. Export your job data anytime for reporting, backup, or migration.