 FieldCamp
Contracts, Terms & Attachments | FieldCamp
Add service contracts, terms and conditions, file attachments, and internal notes to your estimates and invoices in FieldCamp for clarity and protection.
Under the hood — see how Estimates & Invoices work in the FieldCamp data model: the fields they hold, how they connect to your other records, and how to customize them.
A well-prepared estimate or invoice does more than list prices -- it sets expectations, protects your business, and builds trust with your clients. You can create and send estimates directly from the Command Centre using natural language. FieldCamp lets you attach contracts, add terms and conditions, upload supporting files, and include notes on every document.
Service Contracts
What Are Contracts in FieldCamp?
Contracts are reusable agreement templates that formalize the scope of work, responsibilities, and legal obligations between you and your client. You create them once in Settings and attach them to estimates or invoices as needed.
Setting Up Contract Templates
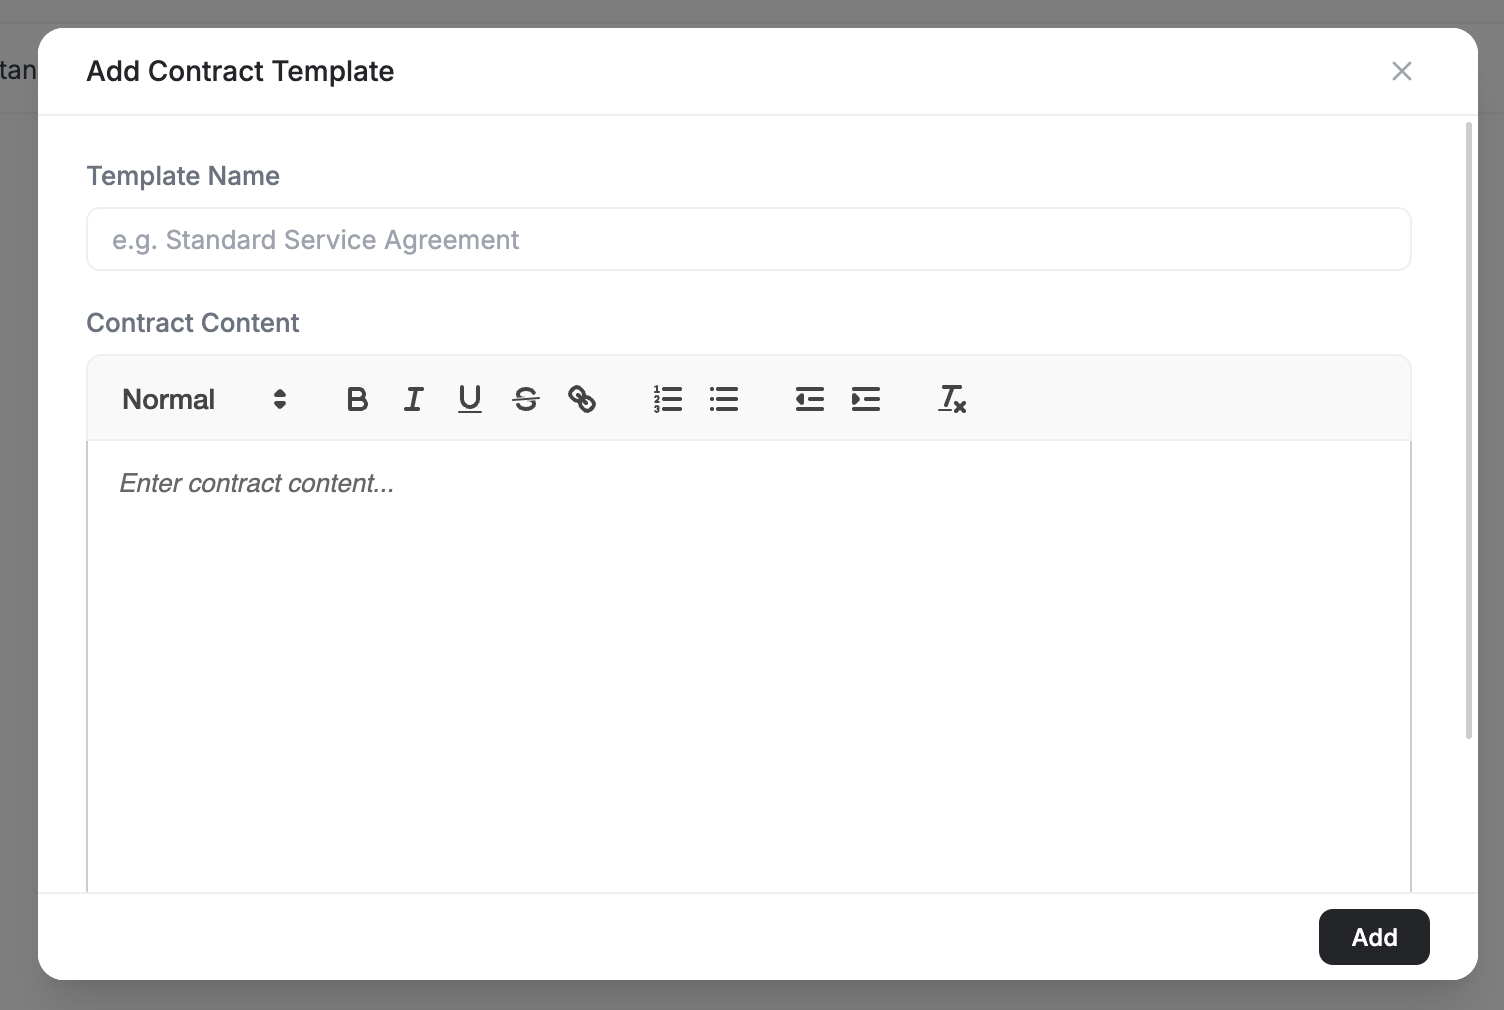
- Go to Settings → Documents & Billing → Contracts
- Click Add Contract Template
- Fill in the details:
| Field | Purpose |
|---|---|
| Template Name | A clear label (e.g., "Annual HVAC Maintenance Agreement") |
| Contract Content | The full contract text, written in the rich text editor |
| Set as default estimate contract | Turn on to fill this contract in on every new estimate |
| Set as default invoice contract | Turn on to fill this contract in on every new invoice |
- Click Add to save
Saved templates are listed with their name, a preview, and which document type each one is the default for.
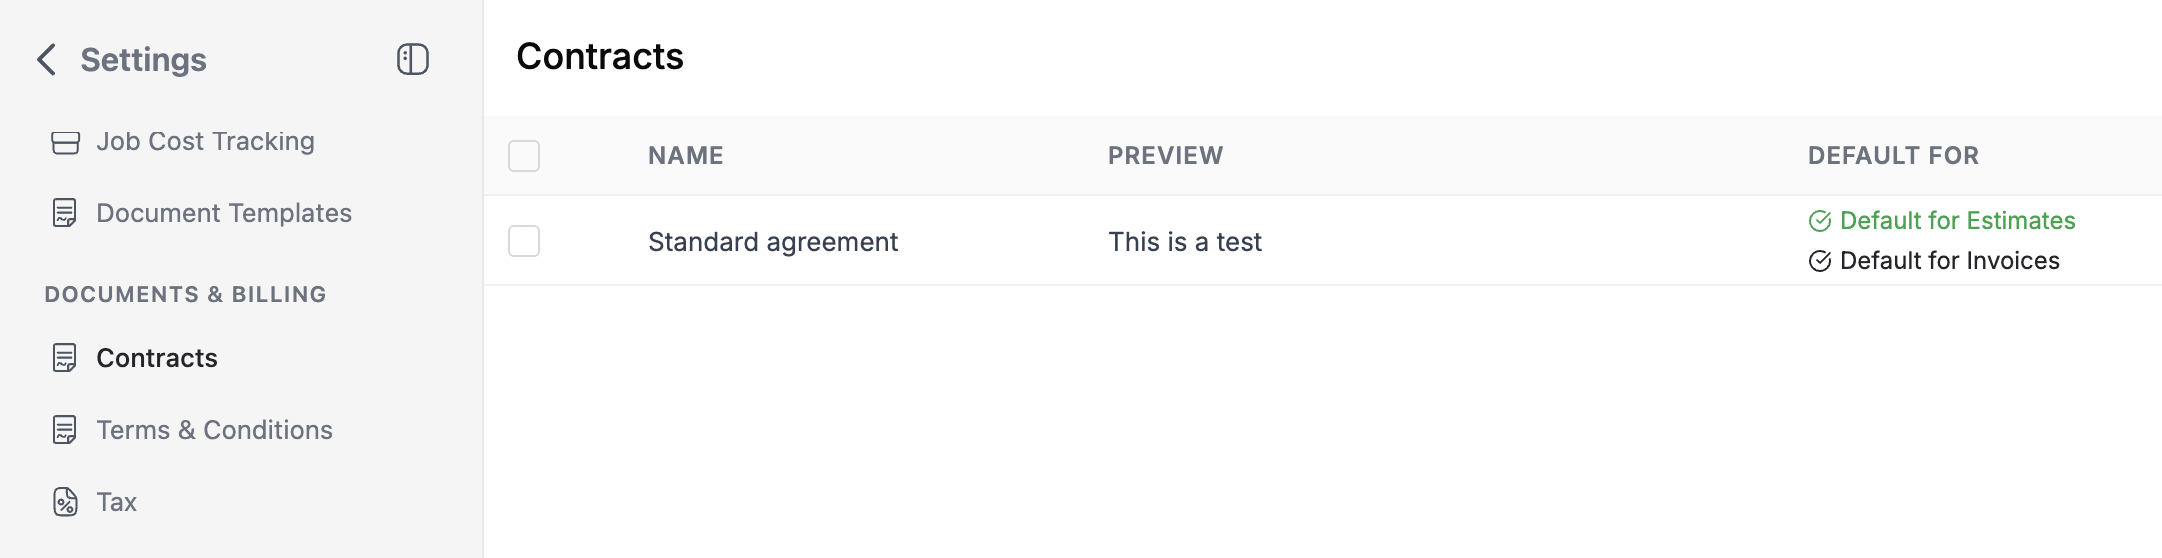
Click a template in that list to change it in the Edit Contract Template modal.
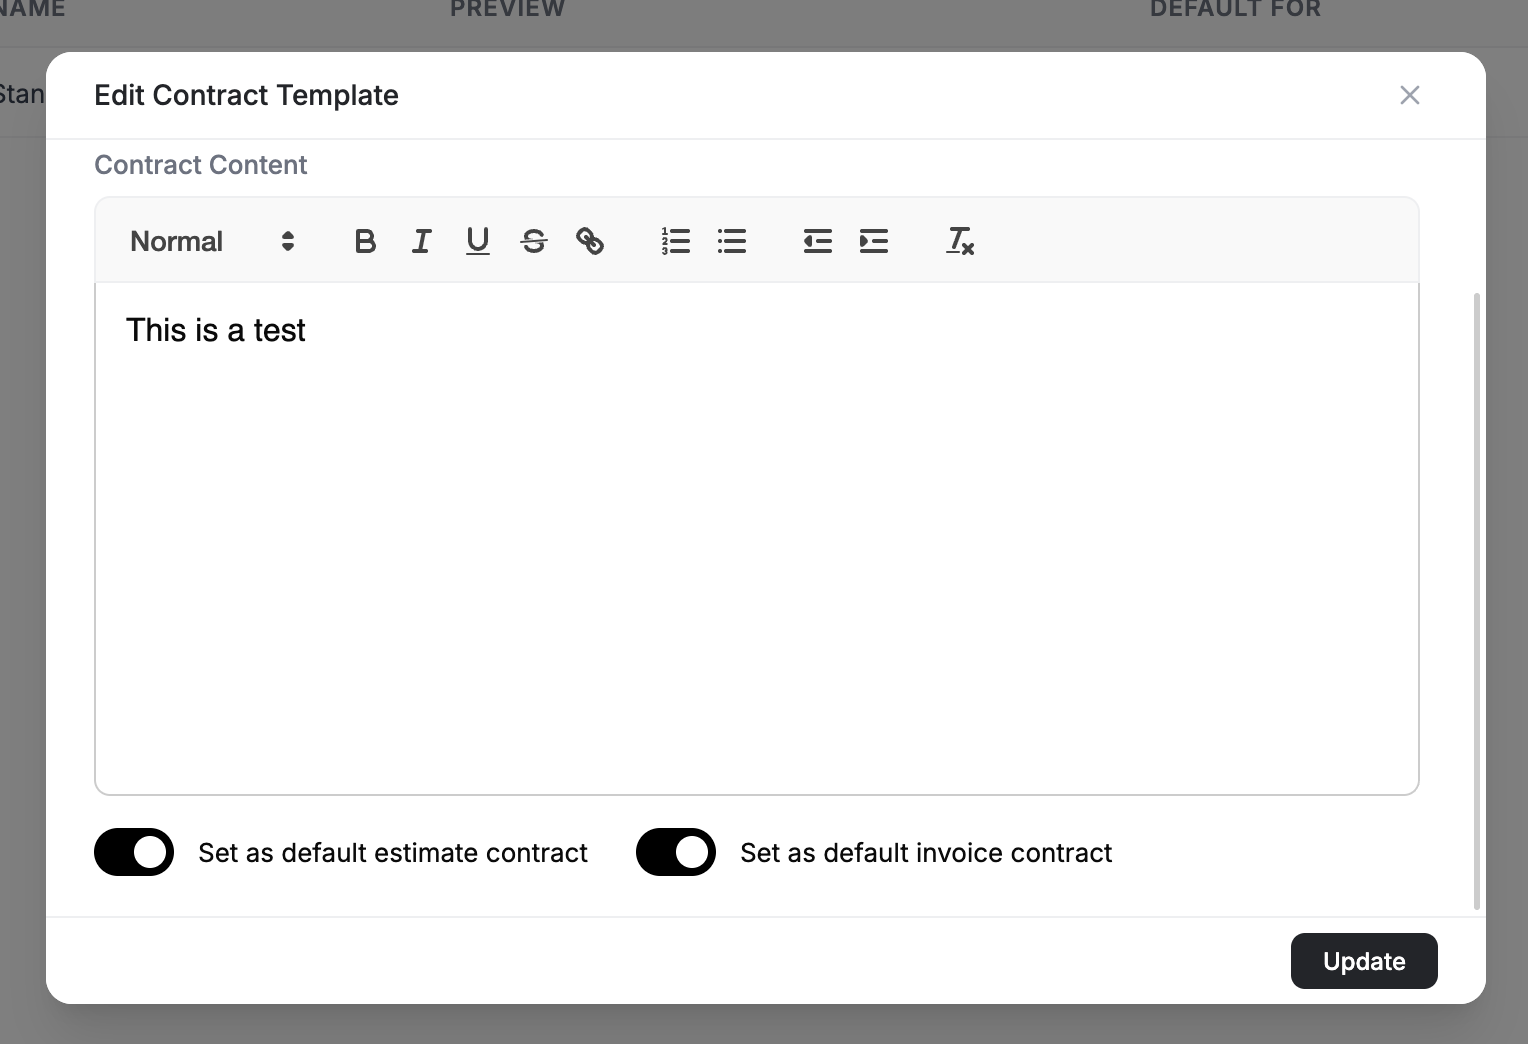
A contract template holds text only — there is no file upload on the template itself. To send a signed PDF or a service schedule alongside the document, use the Attachments section on the estimate or invoice (covered below).
Create a few standard templates for your most common service types -- maintenance agreements, one-time repair contracts, and project-based agreements. This saves time and keeps your terms consistent across every quote.
Attaching a Contract to a Document
When creating or editing an estimate or invoice:
- Scroll to the Contract section. Its dashed box reads No Contract, with the hint Click to select a contract on the right
- Click the box to open the Select Contract window
- Pick a template from the list. The first option is No Contract, which leaves the document without one
- Click Apply Contract. Nothing changes on the document until you press that button
The contract text cannot be edited on the document. The form shows a short preview only, and the picker is the only control. Terms & conditions, by contrast, can be edited on each document.
The same section carries My Signature and Client Signature toggles. These are display-only: they decide which signature blocks appear on the document. Nothing is required or enforced. If your account renames Clients — to Customers, for example — the toggle reads Customer Signature.
On the Classic estimate and invoice form the contract text is copied onto the document, so editing a template later does not change documents you already sent. The newer Dynamic detail view stores only the selected contract and looks its text up live, so there the document follows the template.
When the client views the estimate or invoice, the contract is included. If you also ask for a digital signature, the client reviews and signs both the document and the contract in one step.
Contracts vs. Terms & Conditions
These are two separate settings, and a document can carry both:
| Where you manage it | What it is for | |
|---|---|---|
| Contract | Settings → Documents & Billing → Contracts | The agreement itself — scope, responsibilities, the legal wording the client signs |
| Terms & Conditions | Settings → Documents & Billing → Terms & Conditions | Your standing rules — payment deadlines, cancellation, warranty |
Both can be set as a default for estimates and invoices, so they fill in automatically on every new document.
A contract is attached to an estimate or an invoice, not to a job. For repeat work under an ongoing agreement, set up a recurring job — it creates the whole schedule of visits for you.
Terms and Conditions
Why Add Terms?
Terms and conditions clarify the rules of engagement for each piece of work. They typically cover:
- Payment expectations and deadlines
- Cancellation and refund policies
- Warranty and liability limitations
- Material price fluctuation clauses
- Scope of work boundaries
Adding Terms to a Document
Save your terms once, then reuse them:
- Go to Settings → Documents & Billing → Terms & Conditions
- Click Add Terms & Conditions
- Give it a Template Name (how you recognise it in the list) and write the Terms & Conditions Content
- Turn on Set as default estimate terms or Set as default invoice terms if you want it filled in automatically
- Click Add to save
On a document:
- In the estimate or invoice form, find the Terms & Conditions section
- Pick a saved set from the Select Template (Optional) dropdown
- Edit the text in the editor below it, or write terms for this document only
- The terms are shown to the client when they review the document
Your default set fills in on every new estimate and invoice, and you can still override it on an individual document.
Review your terms regularly to reflect changes in your business policies, pricing structures, or local regulations.
Attachments
Why Attach Files?
Supporting documents add detail, transparency, and credibility. Common attachments include:
- Before-and-after photos of service work
- Blueprints, floor plans, or technical drawings
- Product datasheets and specifications
- Insurance certificates and licenses
- Warranty documentation
How to Attach Files

- In the estimate or invoice form, find the Attachments section
- While it is empty, the section is a dashed box reading Drag & drop files or browser files. Drop files onto the box, or click anywhere inside it to pick files from your computer
- Any file type is accepted. There is no format restriction on attachments.
- Add as many files as needed
Once a file is attached, the box is replaced by a grid of thumbnails. Add more with the + Upload tile — that tile is click-only, so drag and drop stops working after the first file.
Attachments are not emailed automatically. In the Send Email window, tick the files you want under Document Attachments ("Select which images to include with this email"). They always show on the online document the client opens.
Notes
Internal vs. Customer-Facing Notes

Every estimate and invoice has two note fields, in two different places on the form:
| Field | Where it is | Who sees it | Use case |
|---|---|---|---|
| Notes | At the bottom of the Terms & Attachments column | The client | Payment instructions, special job details, thank-you messages |
| Private Notes | In the right-hand sidebar, under the price summary | Your team only | Pricing justification, follow-up reminders, margin notes |
There is no visibility setting on a note. The field you type in decides who sees it.
A document template can switch off the Contract, Terms & Conditions, Attachments and Notes blocks one by one. All four are on by default — if terms or attachments are missing from a document, check the template first.
Best Practices
- Standardize templates -- Create contract templates for your most common service agreements to save time and maintain consistency
- Attach everything upfront -- Include signed agreements, schedules, and photos before sending the estimate. Clients appreciate transparency.
- Keep terms concise -- Long legal blocks get ignored. Write clear, plain-language terms your clients will actually read.
- Use Private Notes liberally -- Record why you set a specific price, what the client mentioned on the phone, or when to follow up. Your future self will thank you.
For documents that require formal approval, combine contracts with digital signatures. The client reviews the contract and signs the estimate in one seamless flow.
Related Articles
- Creating Estimates — build and send professional quotes
- Digital Signatures — add signature fields to estimates and invoices
- Document Templates — customize the look of your documents
- Email Templates — configure the emails that deliver your documents
- Estimate to Job to Invoice — the full conversion workflow
Digital Signatures | FieldCamp
Add digital signature fields to estimates and invoices in FieldCamp. Clients sign online or on mobile devices, with automatic timestamps and audit trails.
Tax Settings | FieldCamp
Set up tax rates in FieldCamp for your region. Configure state, local, and multi-rate taxes that automatically apply to estimates, invoices, and line items.