 FieldCamp
Creating Invoices | FieldCamp
Create invoices in FieldCamp from jobs, estimates, or from scratch. Add line items, apply tax rates, send by email, track payments, and get paid faster.
Under the hood — see how Estimates & Invoices work in the FieldCamp data model: the fields they hold, how they connect to your other records, and how to customize them.
Invoices are how you get paid. FieldCamp lets you create an invoice from a completed job, from an approved estimate, or from scratch. Line items, tax, and client details carry over automatically so you can send a professional invoice in under a minute.
The Fastest Way: Ask the Command Centre
Open the Command Centre and describe what you need:
- "Create an invoice for the completed Smith Residence job"
- "Invoice job 1036"
- "Bill Sarah Johnson for the AC repair -- $450"
- "Generate an invoice from estimate 78"
The Command Centre builds the invoice with all details pre-filled and lets you review before sending. See AI Skills for more examples.
Three Ways to Create an Invoice
| Method | When to use | What auto-fills |
|---|---|---|
| From a job | Work is complete and you are ready to bill | Line items, labor hours, materials, client, job reference |
| From an estimate | Client approved the estimate and you want to invoice directly | All line items, pricing, client details, deposits |
| From scratch | One-off billing not tied to a job or estimate | Nothing -- you add everything manually |
From a Job
Open the completed job, click Create Invoice from the actions menu. Everything from the job transfers: line items, labor logged through job logs, materials used, and client information. Adjust anything before saving.
For the full walkthrough, see Creating Invoices from Jobs.
From an Estimate
Open an approved estimate and click Generate Invoice. All quoted line items, pricing, discounts, and client details transfer. Any deposits collected with the estimate are automatically applied.
From Scratch
Click + New Invoice from the Invoices list. Select the client, add line items, and fill in the details.
Building an Invoice Step by Step
Step 1 -- Select a Client
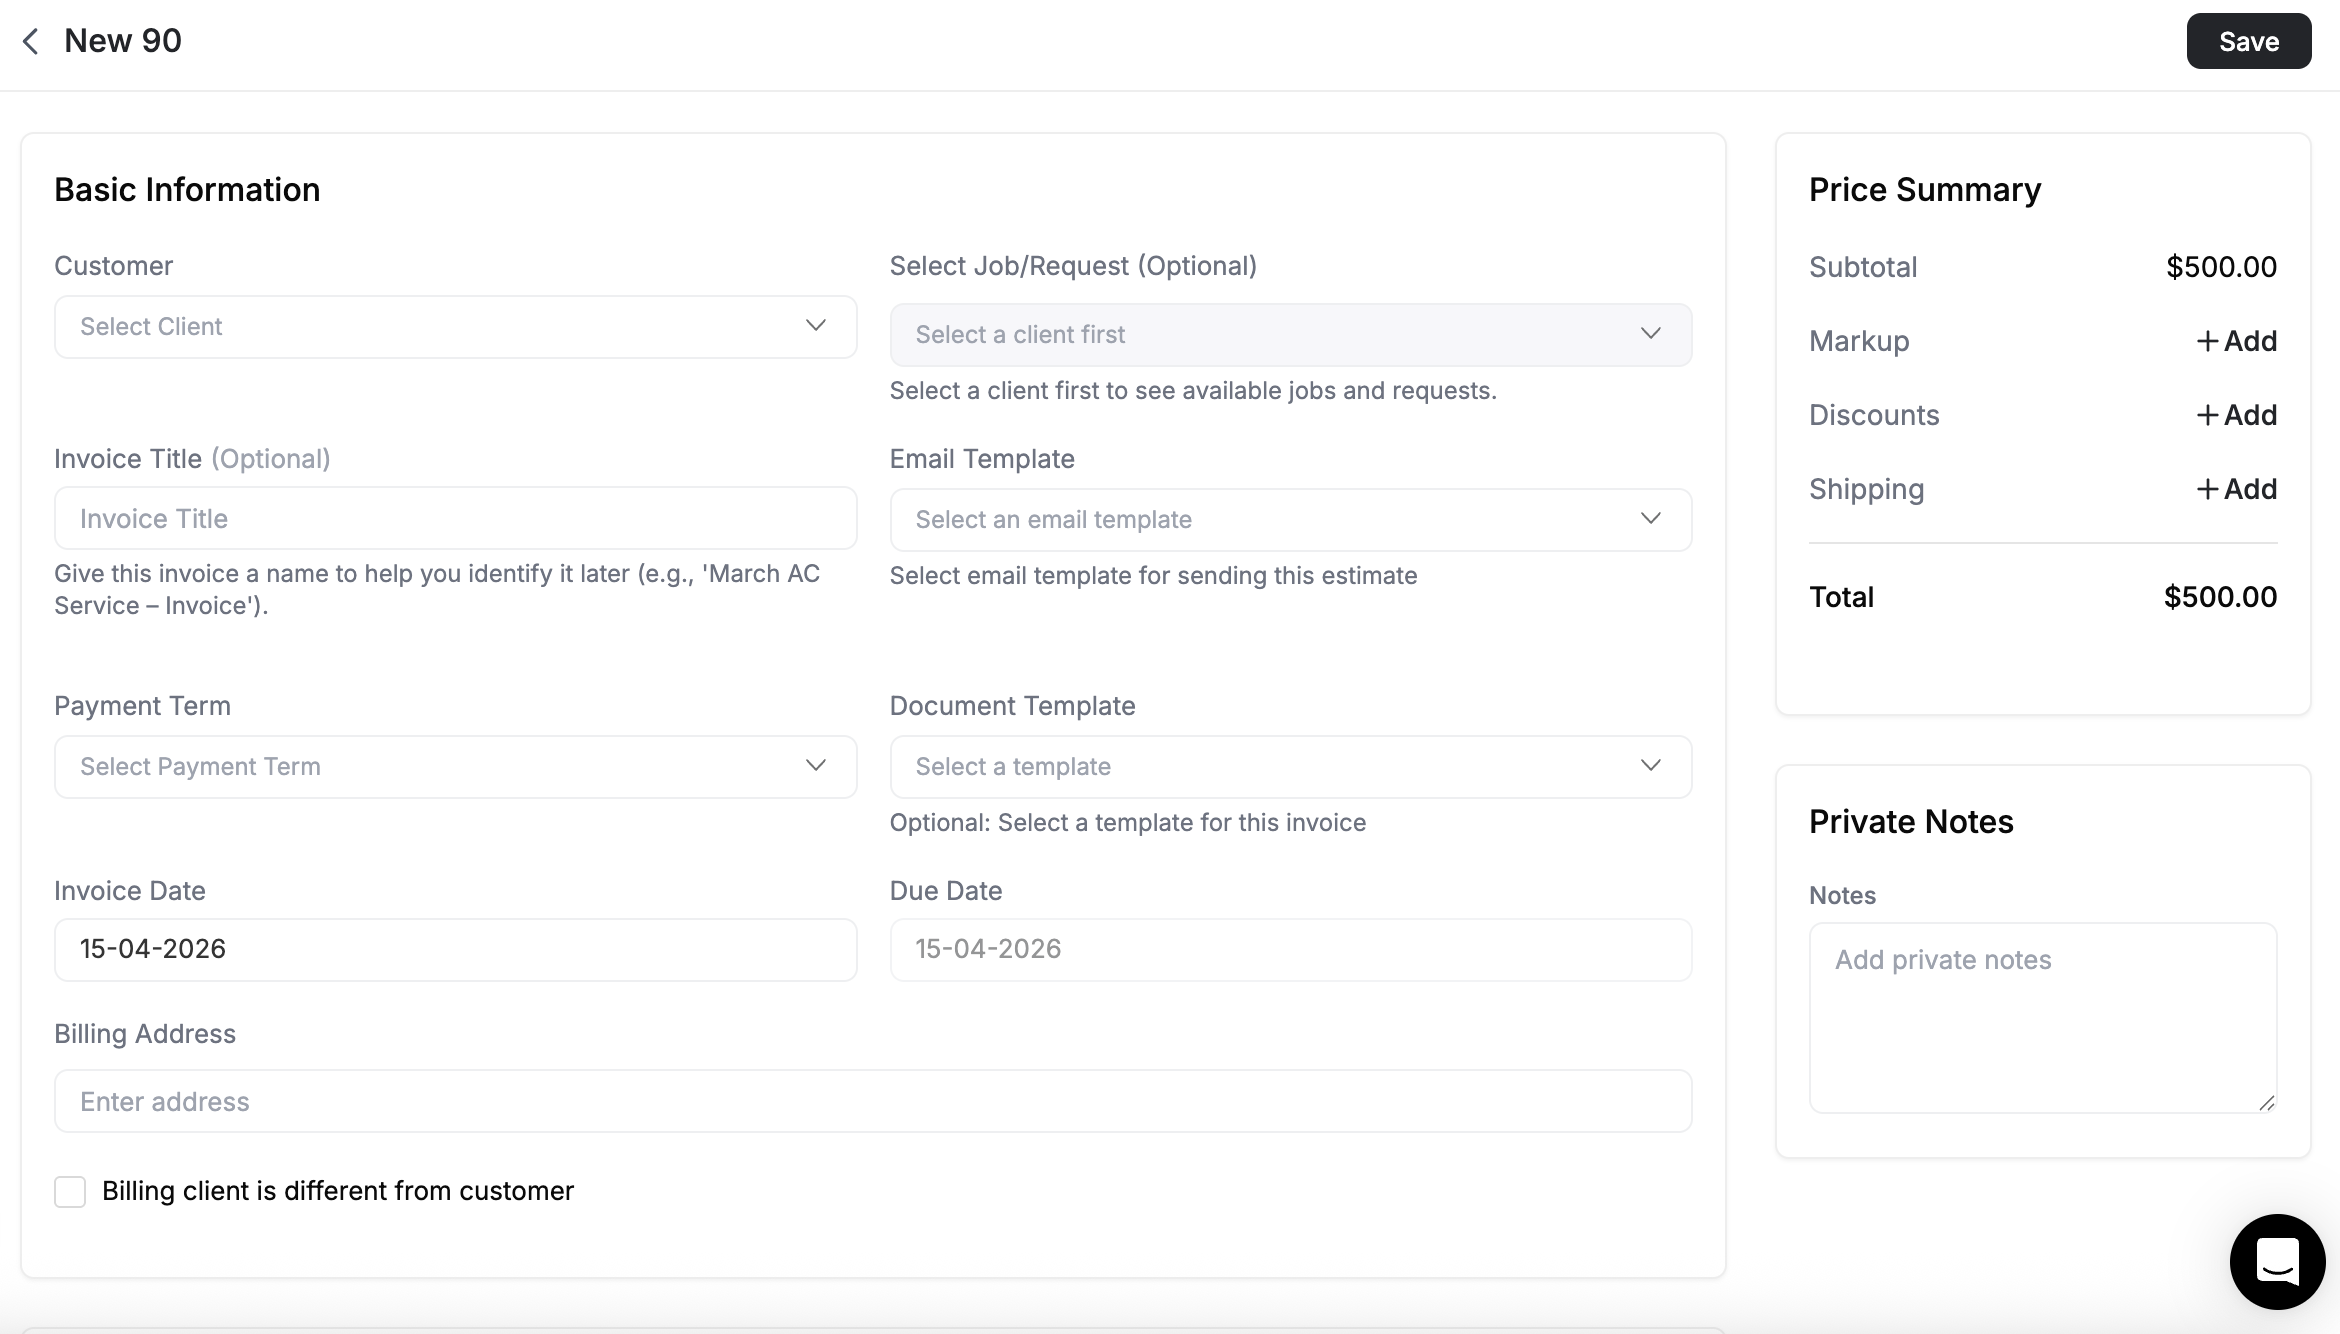
Type the client name and select from the dropdown. FieldCamp auto-fills the billing address, contact email, and default tax settings. Click Add New Client if the client does not exist yet.
Step 2 -- Set Invoice Details
- Invoice Number -- Auto-generated or enter a custom number
- Title -- A descriptive reference (e.g., "Monthly Maintenance -- October")
- Invoice Date -- Defaults to today; backdate if needed
- Due Date -- Based on payment terms
Payment terms:
| Term | Due date |
|---|---|
| Due on receipt | Immediately |
| Net 7 | 7 days |
| Net 14 | 14 days |
| Net 30 | 30 days (most common) |
| Net 45 / 60 / 90 | Extended terms |
| Custom | Any date you choose |
Step 3 -- Add Line Items
From the Price Book -- Click Price Book, browse categories, select items, and add them to the invoice with pre-set pricing.
Manual entry -- Click the description field, type the details, set quantity and rate.
Sections -- Group related items under headings like Labor, Materials, or Additional Services. Each section shows a subtotal.
Step 4 -- Apply Tax and Discounts
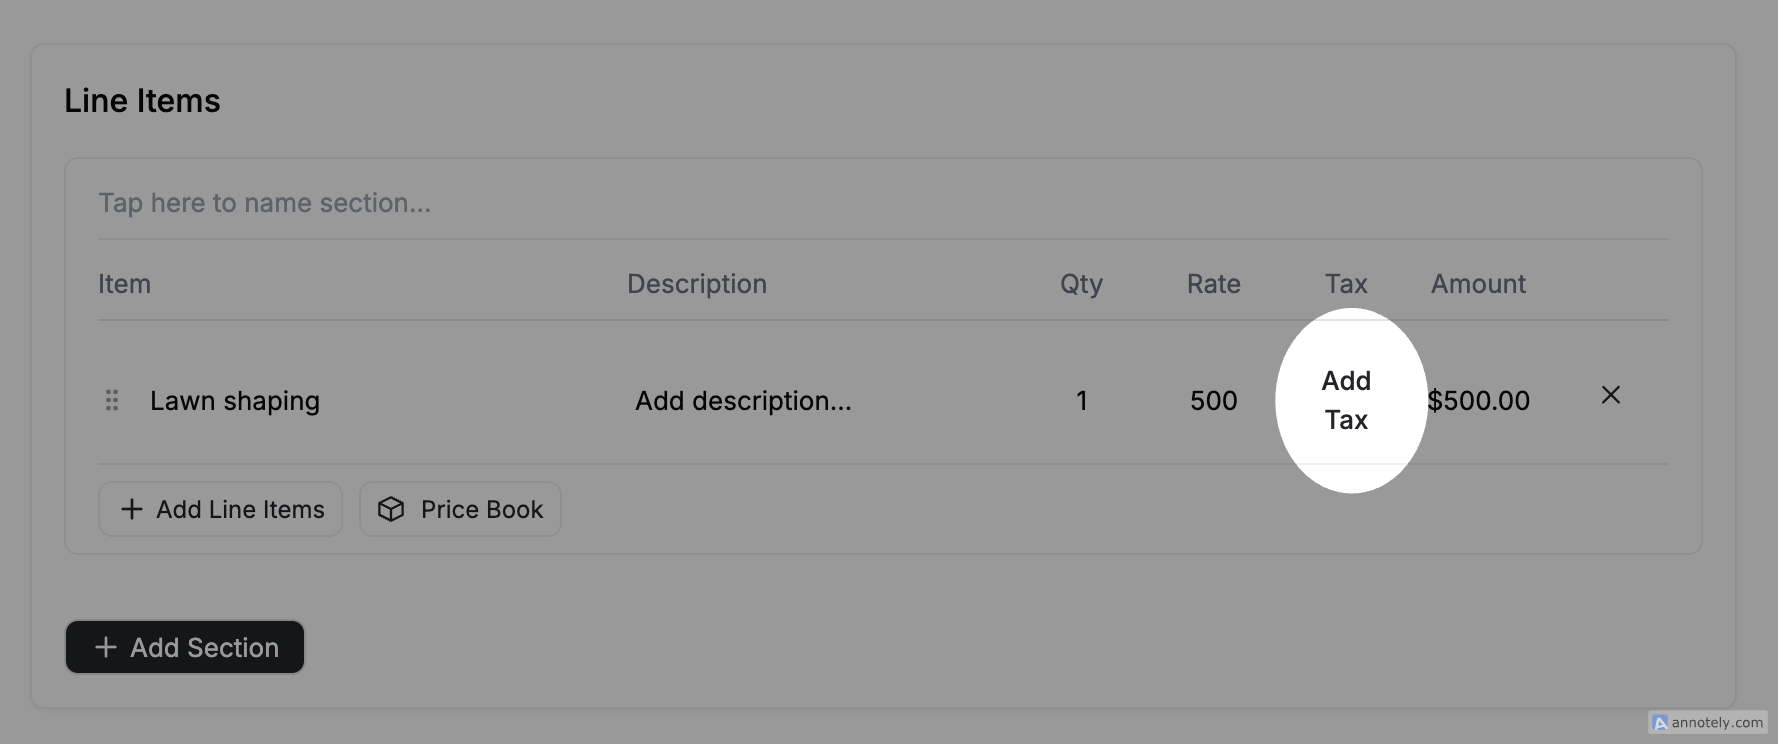
Select a tax rate per line item or for the entire invoice. Apply discounts as a percentage or fixed amount.
If a deposit was collected with the original estimate, FieldCamp deducts it automatically. The invoice shows the deposit amount and the remaining balance. See Deposits for details.
Step 4b -- Pricing: Markup, Discounts, and Shipping
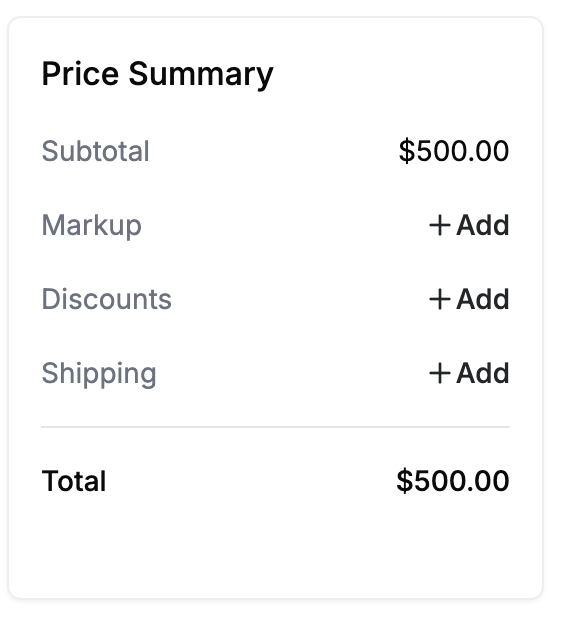
Just like estimates, invoices support markup, discounts, and shipping charges. You will find all three in the price summary area below your line items.
Markup
Markup adds your profit margin on top of the invoice subtotal. Click Markup in the price summary area and choose a percentage or a fixed amount.
| Markup type | Example |
|---|---|
| Percentage | 15% on a $2,000 subtotal = $300 markup |
| Fixed amount | A flat $250 markup regardless of subtotal |
You can apply markup to materials only, labor only, or both. This is useful when your line items reflect actual costs and you want to add your margin separately.
Example: An invoice has $800 in materials and $1,200 in labor. You add a 15% markup on both, which adds $300. The customer sees $2,300 before tax, discounts, or shipping.
If the invoice was generated from an estimate that already had markup, the markup carries over automatically. You can adjust it on the invoice if the final numbers changed during the job.
Discounts
Discounts reduce the invoice total by a percentage or a fixed dollar amount. Discounts apply at the invoice level -- they affect the entire invoice, not individual line items.
Click Discount in the price summary area. In the discount modal, enter the value and choose percentage or fixed amount.
| Discount type | Example |
|---|---|
| Percentage | 10% off a $3,000 invoice = $300 discount |
| Fixed amount | A flat $200 off the invoice total |
Shipping
When the invoice includes physical products that were shipped, click Shipping in the price summary area to add shipping details:
- Shipping amount -- The cost of shipping
- Ship date -- When the shipment went out
- Ship via -- The carrier (e.g., UPS, FedEx, USPS)
- Tracking number -- So the customer can track delivery
- FOB point -- The point where ownership transferred to the buyer
Price Summary
The price summary shows the complete breakdown of the invoice:
| Line | Amount |
|---|---|
| Subtotal (line items) | $2,000.00 |
| Markup (15% on materials and labor) | +$300.00 |
| Discount (10%) | -$230.00 |
| Tax (8.5%) | +$175.95 |
| Shipping | +$35.00 |
| Deposit applied | -$500.00 |
| Balance due | $1,780.95 |
This breakdown appears on the invoice your customer receives, so they can see exactly how the balance was calculated.
Step 5 -- Add Custom Fields (References, Site Name, etc.)
FieldCamp lets you add custom fields to invoices so you can include references like a site name, purchase order number, project code, or any other detail your business needs.
Adding a Custom Field to Invoices
- Go to Settings then Pipeline Configuration
- Click the Invoices row in the table
- Select the Fields tab
- Click Add Field
- Enter the field details:
- Label -- The name of the field (e.g., "Site Name", "PO Number", "Project Reference")
- Type -- Choose from Text, Textarea, Number, Currency, Date, Boolean, Select, Multi-Select, Email, Phone, or URL
- Is Required -- Toggle on if this field must be filled on every invoice
- Click Create
The field is immediately available on all new invoices. This works the same way as custom client fields, but scoped to invoices.
| Example custom field | Type | Use case |
|---|---|---|
| Site Name | Text | Reference the job site or property on the invoice |
| PO Number | Text | Client-provided purchase order number |
| Project Reference | Text | Internal project code or reference |
| Contract Number | Text | Link to a service contract |
Filling In Custom Fields
Once created, custom fields appear on the invoice form alongside the standard fields. Fill them in when creating or editing an invoice. If the invoice is generated from a job or estimate that has matching custom fields, the values carry over automatically.
Showing Custom Fields on the Invoice Document
Custom fields appear on the invoice form by default, but to display them on the client-facing document (online view and PDF), you need to enable them in your document template. Go to Settings then Document Templates then Invoices, open the Customer View tab, and toggle the custom field on. See Displaying Custom Fields on Documents for the full walkthrough.
Only account admins can add, edit, or delete custom fields. See Roles and Permissions for details. System fields (like Invoice Number and Date) cannot be modified or removed. Once a custom field is created, its type cannot be changed -- create a new field with the correct type if needed.
Step 6 -- Add Notes, Terms, and Attachments
- Customer notes -- Payment instructions, thank-you message, or job summary visible to the client
- Internal notes -- Only your team sees these
- Terms and conditions -- Your standard payment terms or custom text
- Attachments -- Photos of completed work, warranty documents, or service reports
Step 6 -- Save and Send
- Save as Draft -- Keep editing later
- Save and Preview -- Review the client's view before sending
- Save and Send -- Deliver immediately by email
Invoice Statuses
| Status | Meaning |
|---|---|
| Draft | Created but not sent |
| Sent | Delivered to the client by email |
| Viewed | Client has opened the invoice |
| Partially Paid | Some payment received; balance remaining |
| Paid | Full payment received |
| Overdue | Past the due date with an outstanding balance |
| Canceled | Voided; no payment expected |
FieldCamp updates statuses automatically when payments are recorded, due dates pass, or clients interact with the invoice.
Sending an Invoice
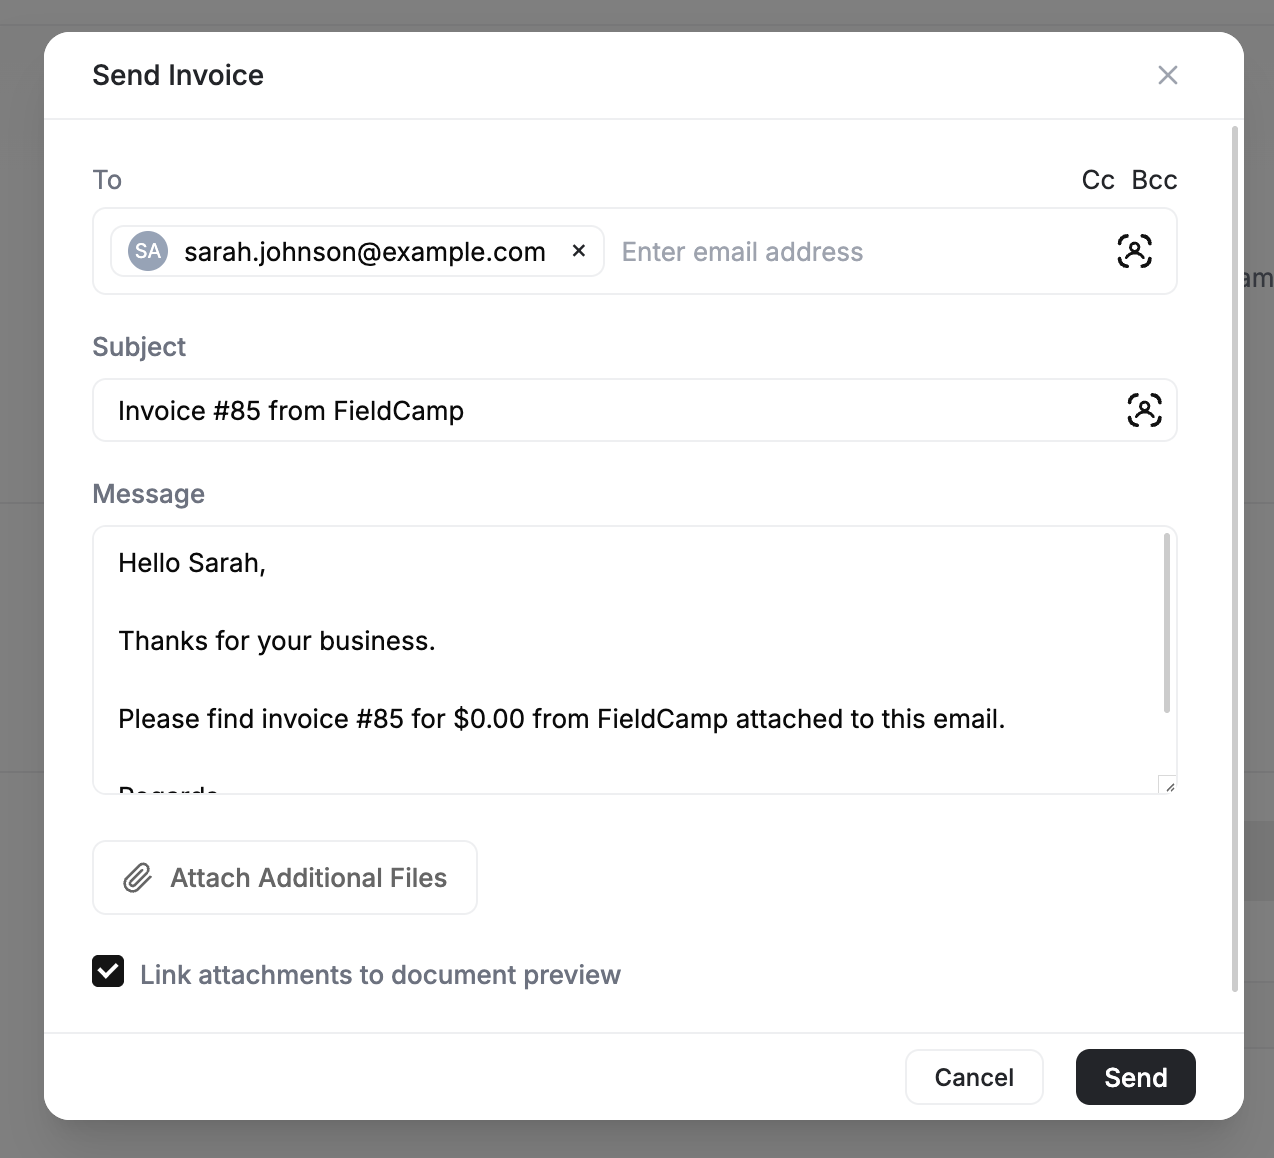
Click Send to deliver the invoice by email. Configure the To, CC, and BCC fields, customize the subject line and message body, and send.
Clients receive a link to view the invoice online. From there they can:
- Pay online using Stripe
- Download a PDF for their records
- View the full breakdown of line items, tax, and terms
Recording Payments
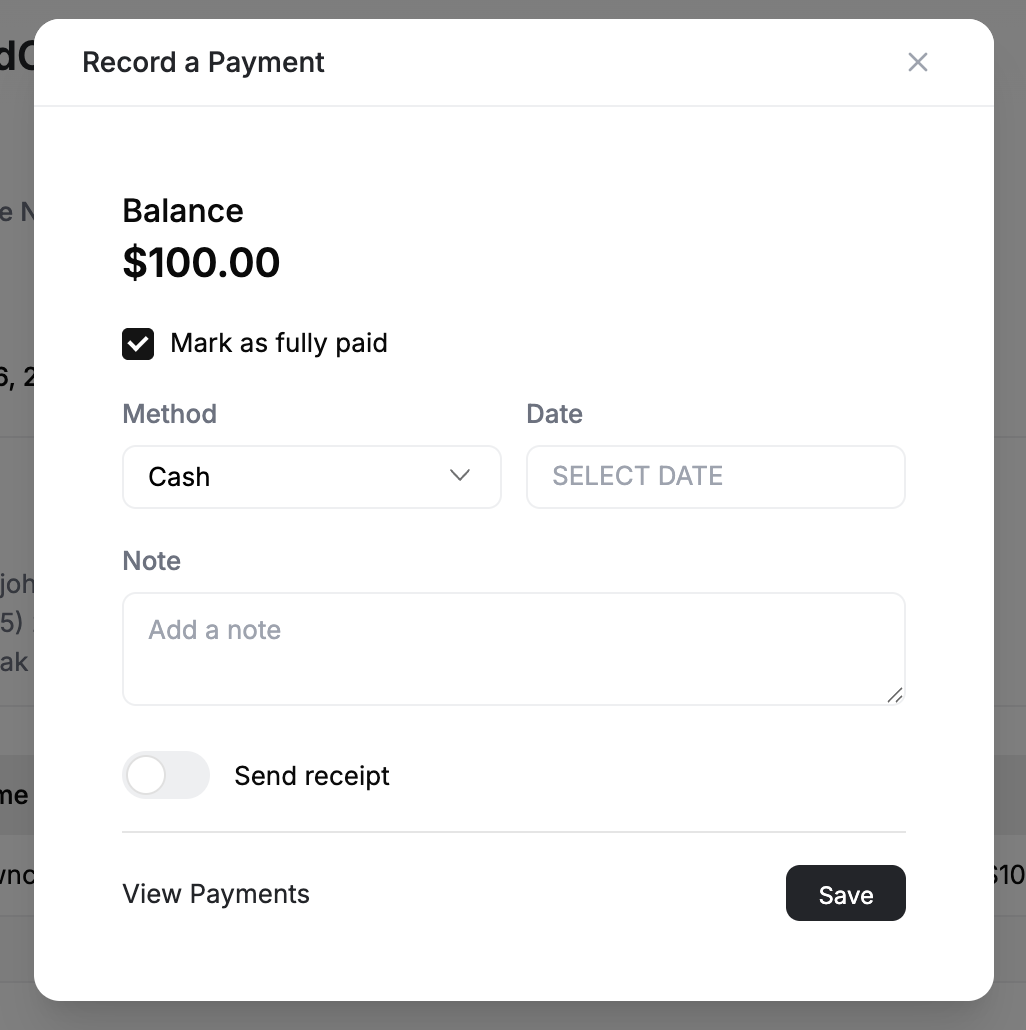
When a client pays, open the invoice and click Record Payment:
- Enter the amount (full or partial)
- Select the payment method -- cash, check, card, bank transfer, or other

- Add a reference number (check number, transaction ID)
- Add optional notes
For partial payments, the system calculates the remaining balance and updates the status to Partially Paid. A receipt is generated automatically and can be emailed to the client.
Online Payments
If you have Stripe connected, clients can click Pay Now directly from the emailed invoice. Payment is recorded automatically, the status updates to Paid, and a receipt is sent.
For recurring service work, you can set up auto-deducting payments to charge the client's card on file when an invoice is created or a recurring job completes.
Recurring Invoices
For ongoing service contracts -- monthly maintenance, weekly cleaning, quarterly inspections -- FieldCamp can automatically generate invoices on a schedule so you never forget to bill.
How It Works
When you set up a recurring job, FieldCamp can create an invoice each time a visit completes or on a fixed schedule:
| Trigger | When an invoice is created |
|---|---|
| On visit completion | Automatically after each recurring visit is marked complete |
| Fixed schedule | On a set date (e.g., 1st of every month) regardless of visit status |
Each generated invoice includes the line items from the job, the correct billing period, and the client's payment details.
Setting Up Recurring Invoices
- Open the recurring job or create a new one
- In the Billing section, enable Auto-Invoice
- Choose the trigger: on visit completion or on a fixed schedule
- Set the frequency if using a fixed schedule (weekly, monthly, quarterly)
- Save the job
FieldCamp handles the rest. Each auto-generated invoice appears in your Invoices list with a status of Draft (so you can review before sending) or Sent (if you enable auto-send).
Combine recurring invoices with auto-deducting payments to charge the client's card on file automatically -- no manual steps at all.
What Your Customer Sees (Invoice Document View)
When you send an invoice by email, the client receives a link to view it online. The invoice document view is a clean, branded page that shows:
- Your company logo, name, and contact information
- Invoice number, date, due date, and payment terms
- All line items with descriptions, quantities, rates, and totals
- Tax, discounts, deposits applied, and the balance due
- Any customer-facing notes, terms, and attachments
From this page the customer can:
| Action | How it works |
|---|---|
| Pay online | Click Pay Now to pay via Stripe. Payment is recorded automatically and a receipt is sent. |
| Download PDF | Save a PDF copy for their records |
| View breakdown | See the full line-item detail, tax calculations, and any deposits applied |
If a digital signature is required, the customer signs before the invoice is marked as acknowledged.
Managing Invoices
Preview
Click Preview to see the invoice exactly as your client sees it -- branded layout, line items, totals, and payment button.
Edit
You can edit invoices that have not been paid. Once a payment is recorded, the invoice locks. If you need to adjust a partially paid invoice, void it and create a new one.
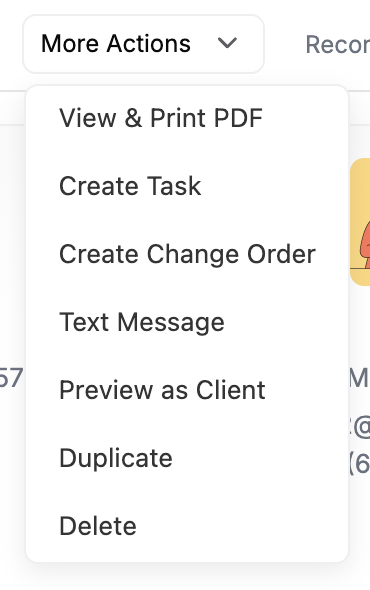
Duplicate
Click Duplicate to copy the invoice for similar work. Useful for repeat clients or monthly service billing.
Delete
Draft invoices can be deleted. Sent invoices should be voided (canceled) to keep your audit trail intact. You cannot delete an invoice that has received any payment.
Digital Signatures
Require your signature, the client's, or both on any invoice. See Digital Signatures for setup.
What to Read Next
- Invoice Views and Analytics -- Track outstanding balances, payment trends, and overdue invoices
- Estimate to Job to Invoice -- The complete billing lifecycle in one article
- Stripe Payments -- Accept online payments from your invoices
- Tax Settings -- Configure tax rates for your region
Estimate Views & Analytics | FieldCamp
Switch between table, kanban, and analytics views for your estimates and quotes. Track conversion rates, pipeline value, and approval trends in FieldCamp.
Invoice Views & Analytics | FieldCamp
Switch between table, kanban, and analytics views for invoices in FieldCamp. Track revenue, outstanding balances, overdue payments, and collection trends.