 FieldCamp
Creating Estimates | FieldCamp
Create professional estimates (quotes) in FieldCamp with multi-option pricing, line items from your price book, deposits, customer approvals, and one-click job conversion.
Under the hood — see how Estimates & Invoices work in the FieldCamp data model: the fields they hold, how they connect to your other records, and how to customize them.
Estimates (also called quotes) are how you price work before it starts. FieldCamp lets you build detailed, professional-looking estimates in minutes, send them to clients for approval, and convert them into jobs with one click once approved.
The Fastest Way: Ask the Command Centre
Open the Command Centre and describe the estimate you need:
- "Create an estimate for Sarah Johnson -- AC repair, $450"
- "Quote the Smith Residence a full kitchen plumbing renovation"
- "Build an estimate for ABC Property Management -- annual HVAC maintenance, 12 units"
The Command Centre creates the estimate, adds line items, applies tax, and lets you review before sending. See AI Skills for the full list of things you can ask.
Creating an Estimate Manually
Step 1 -- Start a New Estimate
There are several ways to start:
| Starting point | How |
|---|---|
| Estimates list | Click + New Estimate (top-right) |
| Client profile | Open the client, click Create Estimate |
| Service request | From the request, click Generate Estimate |
| Existing estimate | Open an estimate, click Duplicate |
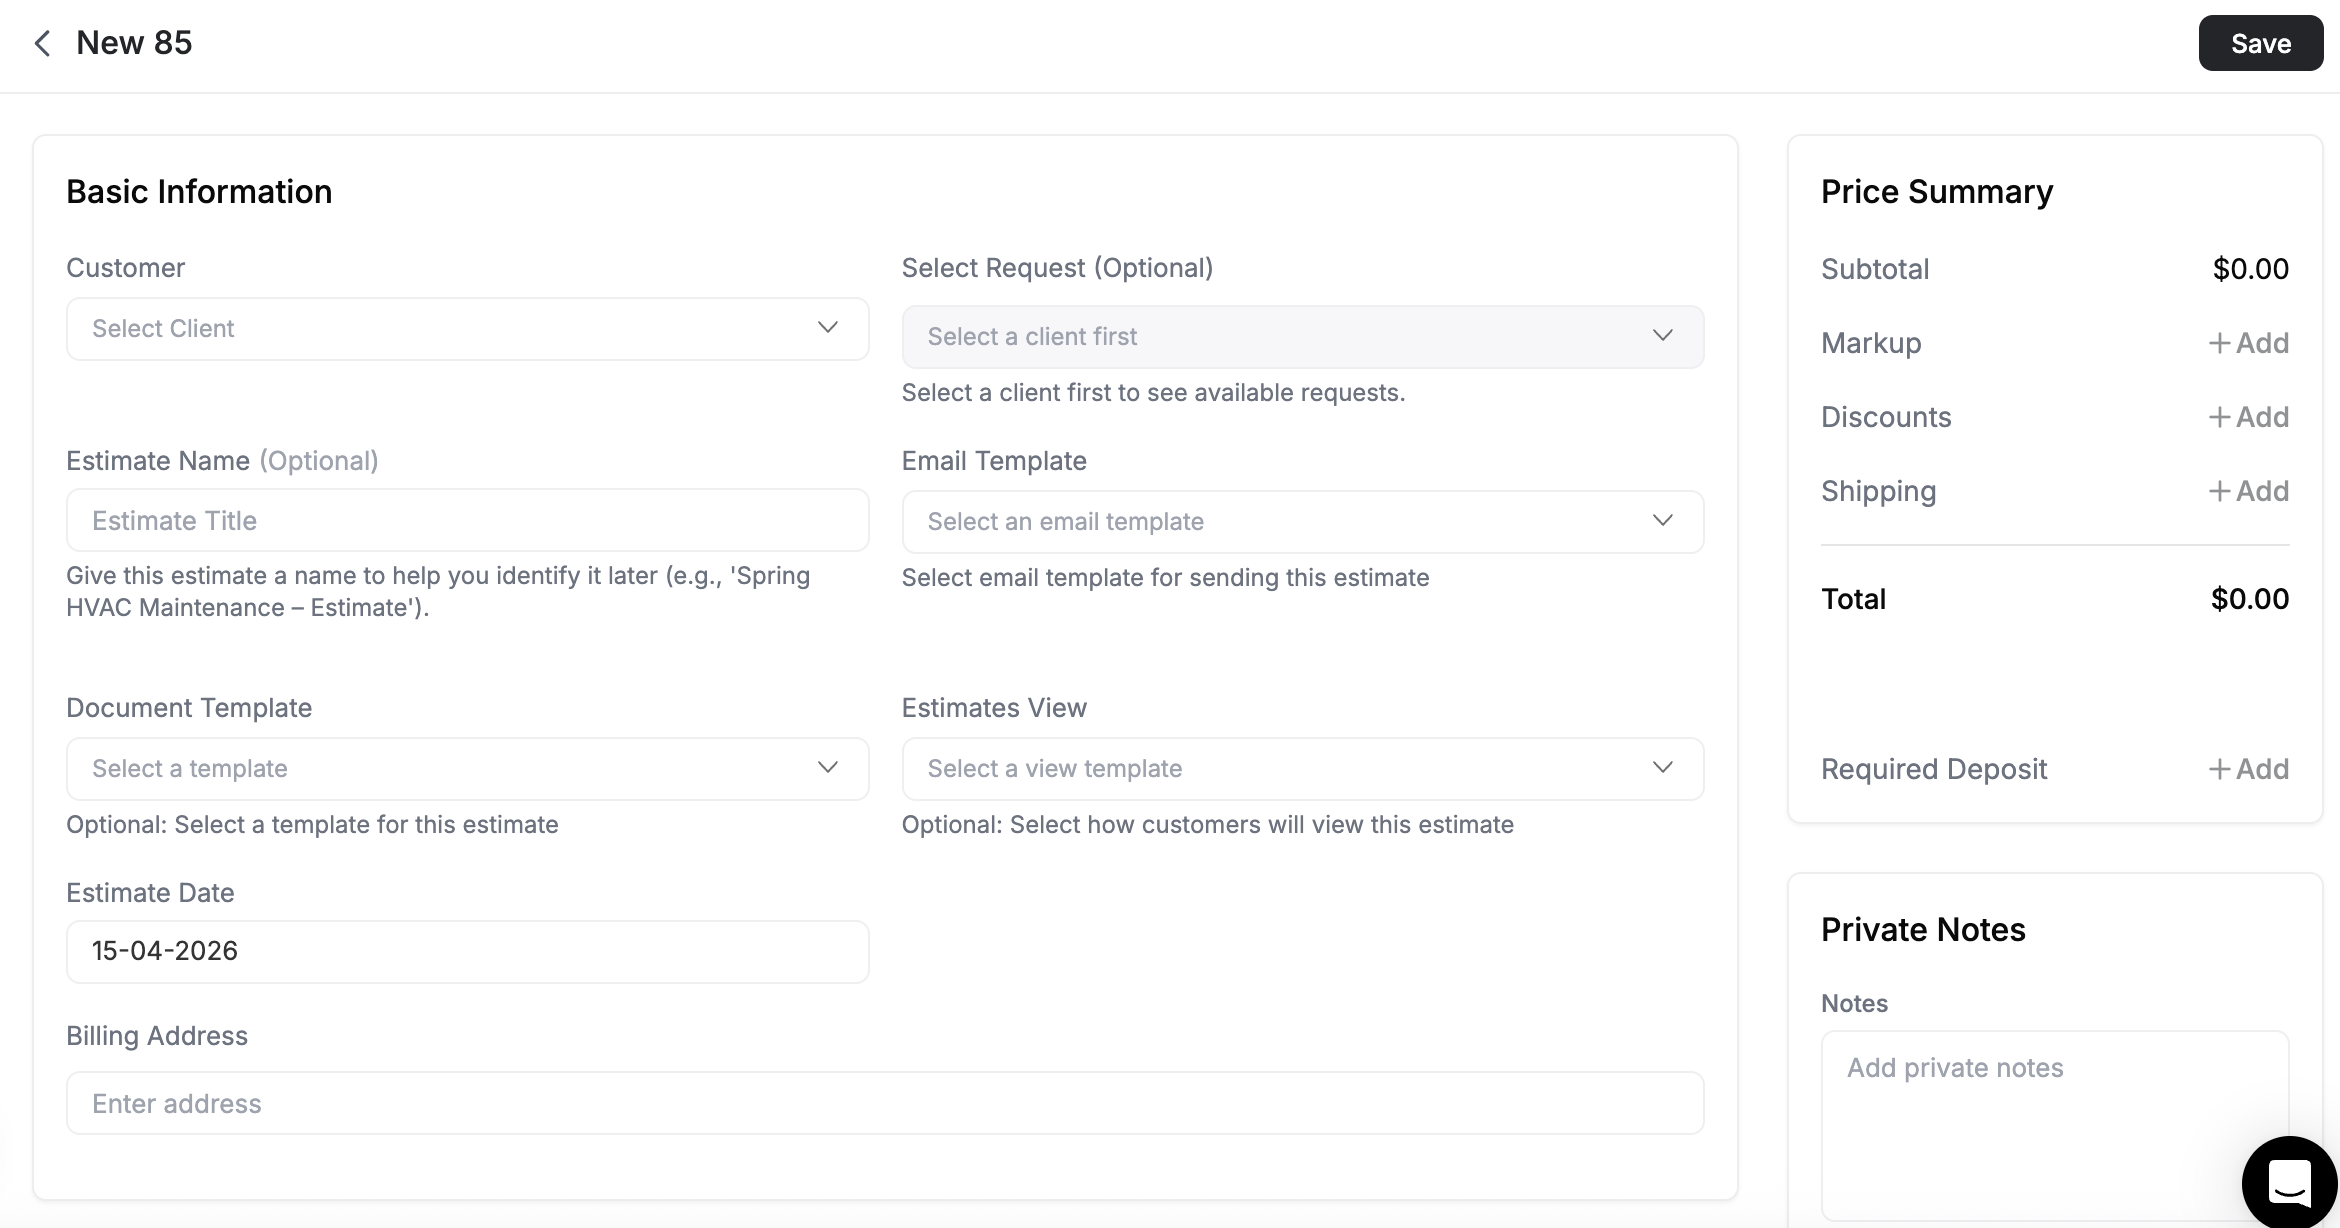
Step 2 -- Select a Client
Start typing the client name and select from the dropdown. FieldCamp auto-fills the billing address, contact information, and any default tax settings.
If the client does not exist yet, click Add New Client in the dropdown and fill in their details without leaving the estimate form.
Step 3 -- Add Line Items
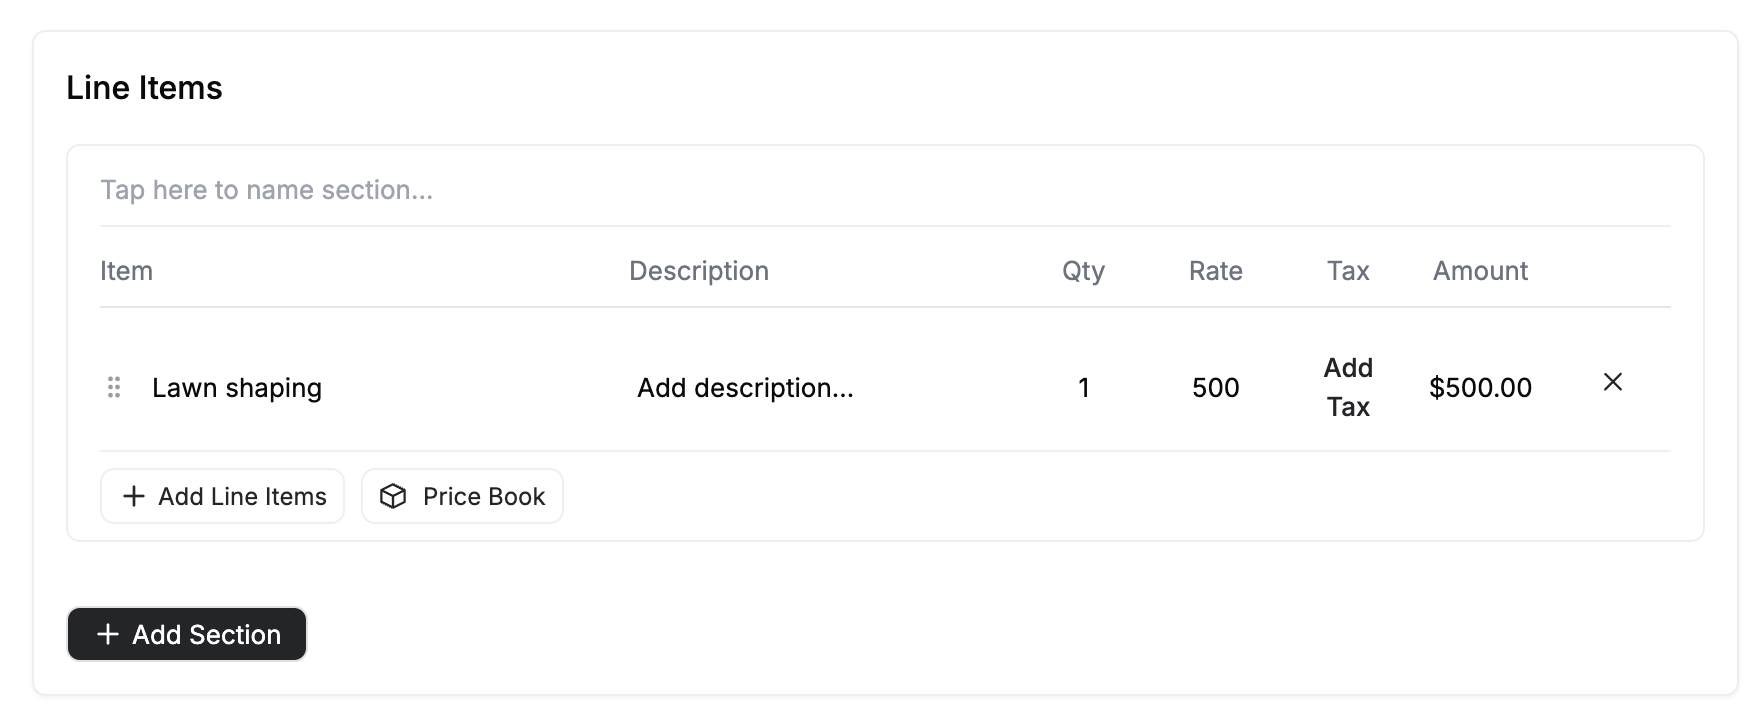
Each line item includes a description, quantity, rate, and optional tax.
From the Price Book -- Click Price Book, browse or search your products and services, and add items with pre-set pricing. Adjust quantities as needed.
Manual entry -- Click the description field and type the service or product details. Set the quantity and rate, and the amount calculates automatically.
Sections -- For complex estimates, click Add Section to group line items under headings like Labor, Materials, or Optional Add-Ons. Each section shows its own subtotal.
Step 4 -- Set Tax and Discounts
Select a tax rate for each line item or apply tax at the estimate level. You can apply discounts as a percentage or fixed dollar amount per line item or on the subtotal.
If you have not configured tax rates yet, go to Settings then Tax to create them. See Tax Settings for the full walkthrough.
Step 4b -- Pricing: Markup, Discounts, and Shipping
The price summary area below your line items is where you fine-tune the final number your customer sees. You can add markup, apply a discount, and include shipping charges -- all in a few clicks.
Markup
Markup is your profit margin added on top of costs. It is the difference between what the work costs you and what the customer pays.
To add markup, click Markup in the price summary area. You have two options:
| Markup type | Example |
|---|---|
| Percentage | 20% on a $1,000 subtotal = $200 markup |
| Fixed amount | A flat $200 markup regardless of subtotal |
You can apply markup to materials only, labor only, or both materials and labor. Each estimate option (if using multi-option mode) can have its own markup, so you can offer different profit margins across pricing tiers.
Example: Your costs are $1,000 in materials and $500 in labor. You add a 20% markup on both. That adds $300 in markup, and the customer sees $1,800 before tax and discounts.
Markup is separate from your line item pricing. If you already build profit into your rates, you may not need markup. Markup is most useful when you want to show cost transparency to the customer while adding your margin on top.
Discounts
Discounts reduce the estimate total by a percentage or a fixed dollar amount. Unlike markup, discounts are applied at the estimate level -- they apply to the entire estimate, not to individual line items or options.
To add a discount, click Discount in the price summary area. In the discount modal, enter the value and choose whether it is a percentage or a fixed amount.
| Discount type | Example |
|---|---|
| Percentage | 10% off a $2,000 estimate = $200 discount |
| Fixed amount | A flat $150 off the estimate total |
Shipping
When your estimate includes physical products that need to be shipped, you can add shipping charges. Click Shipping in the price summary area to open the shipping modal, where you can fill in:
- Shipping amount -- The cost of shipping
- Ship date -- When the shipment will go out
- Ship via -- The carrier (e.g., UPS, FedEx, USPS)
- Tracking number -- So the customer can track delivery
- FOB point -- The point where ownership transfers to the buyer
Price Summary
After adding line items, markup, discounts, tax, and shipping, the price summary shows the complete breakdown:
| Line | Amount |
|---|---|
| Subtotal (line items) | $1,500.00 |
| Markup (20% on materials and labor) | +$300.00 |
| Discount (10%) | -$180.00 |
| Tax (8%) | +$129.60 |
| Shipping | +$45.00 |
| Total | $1,794.60 |
This breakdown appears on the estimate document your customer receives, so they can see exactly how the total was calculated.
Step 5 -- Add Custom Fields (References, Site Name, etc.)
You can add custom fields to estimates to include references like a site name, project code, or purchase order number. These fields help your team and clients identify what the estimate relates to.
Adding a Custom Field to Estimates
- Go to Settings then Pipeline Configuration
- Click the Estimates row in the table
- Select the Fields tab
- Click Add Field
- Enter the field details:
- Label -- The name of the field (e.g., "Site Name", "PO Number", "Project Reference")
- Type -- Choose from Text, Textarea, Number, Currency, Date, Boolean, Select, Multi-Select, Email, Phone, or URL
- Is Required -- Toggle on if this field must be filled on every estimate
- Click Create
The field is immediately available on all new estimates. This works the same way as custom client fields, but scoped to estimates.
| Example custom field | Type | Use case |
|---|---|---|
| Site Name | Text | Reference the property or location being quoted |
| PO Number | Text | Client-provided purchase order number |
| Project Reference | Text | Internal project code or reference |
Filling In Custom Fields
Once created, custom fields appear on the estimate form alongside the standard fields. Fill them in when creating or editing an estimate. When you convert an estimate to a job or generate an invoice, matching custom fields carry over automatically.
Showing Custom Fields on the Estimate Document
Custom fields appear on the estimate form by default, but to display them on the client-facing document (online view and PDF), you need to enable them in your document template. Go to Settings then Document Templates then Estimates, open the Customer View tab, and toggle the custom field on. See Displaying Custom Fields on Documents for the full walkthrough.
Only account admins can add, edit, or delete custom fields. See Roles and Permissions for details. System fields cannot be modified or removed. Once a custom field is created, its type cannot be changed -- create a new field with the correct type if needed.
Step 6 -- Add Notes, Terms, and Attachments
- Customer notes -- Visible on the estimate. Use these for special instructions or value propositions.
- Internal notes -- Only your team sees these. Use for pricing justification or follow-up reminders.
- Terms and conditions -- Attach your standard terms or customize per estimate.
- Contracts -- Link a service contract for formal agreements.
- Attachments -- Drag and drop files (PDF, JPG, PNG) to include brochures, reference photos, or specifications.
Step 6 -- Save
- Save as Draft -- Continue editing later.
- Save and Preview -- See exactly what the client will see.
- Save and Send -- Deliver the estimate immediately by email.
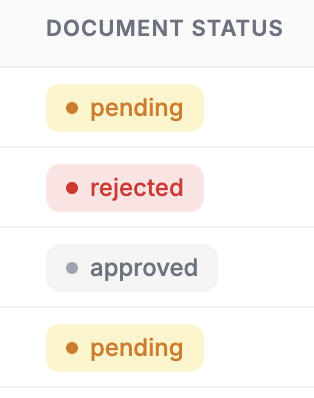
Estimate Statuses
Every estimate moves through a lifecycle:
| Status | Meaning |
|---|---|
| Draft | Created but not sent to the client |
| Sent | Delivered by email |
| Viewed | Client has opened the estimate |
| Approved | Client accepted the quote |
| Rejected | Client declined |
| Expired | Past the validity/expiration date |
When a client approves an estimate, you can convert it to a job immediately or let it wait until you are ready to schedule.
Sending an Estimate
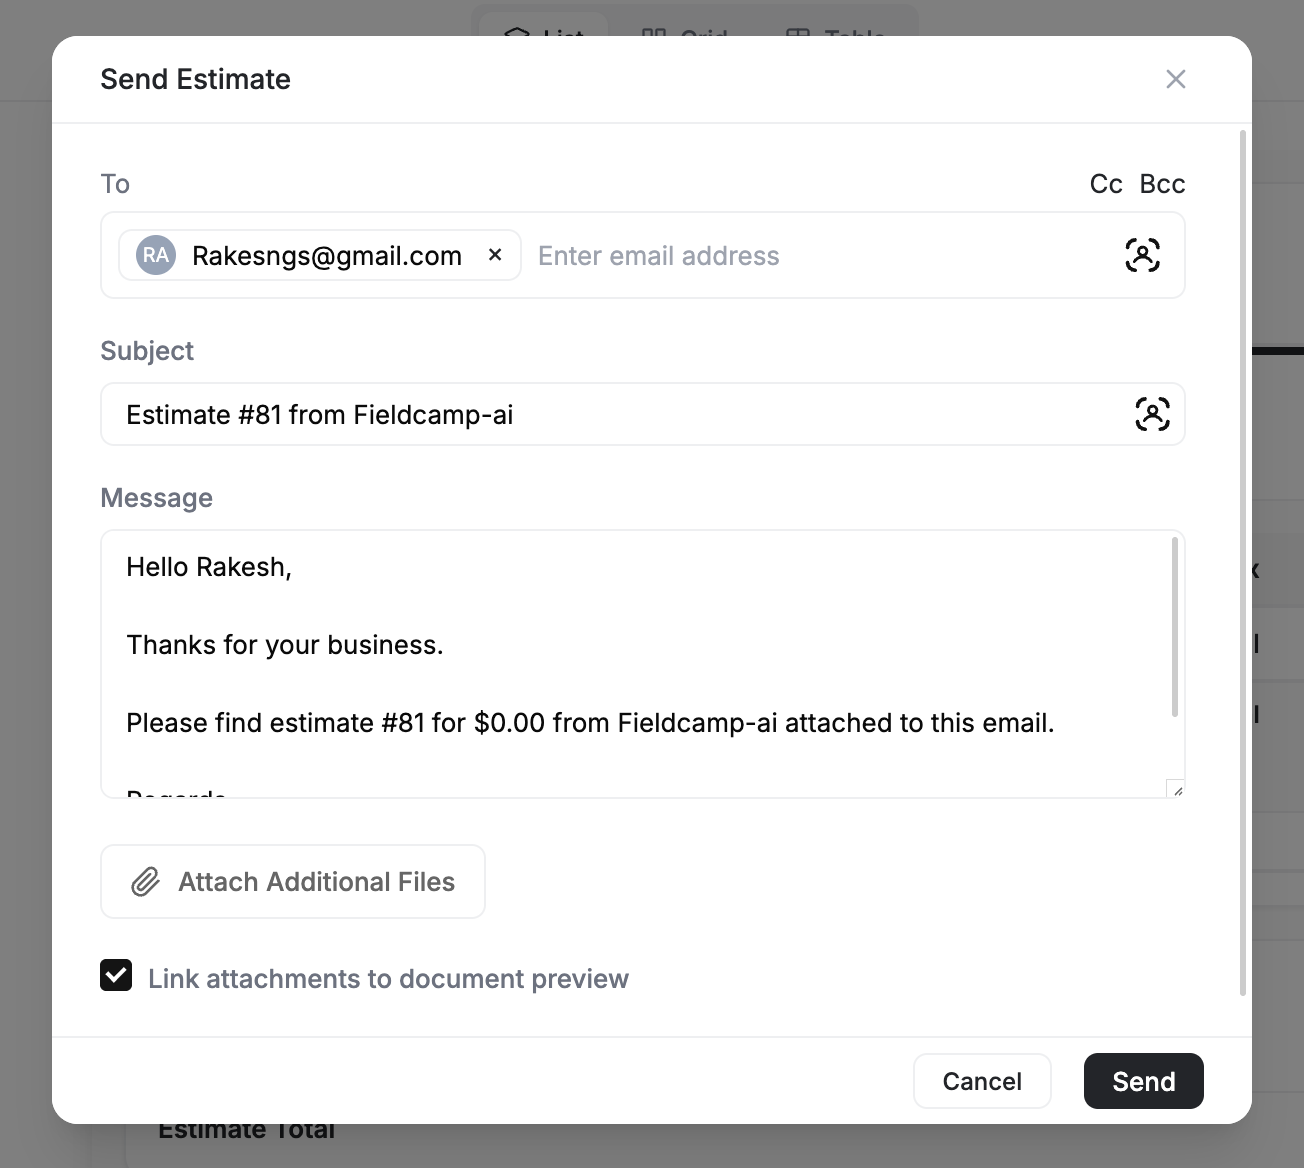
Click Send to deliver the estimate by email. You can configure:
- To -- The client's email (auto-filled from their profile)
- CC / BCC -- Additional recipients such as property managers or your sales manager
- Subject line -- Customize or use the default format
- Message body -- Add a personal note, highlight urgency, or explain next steps
Clients receive a link to view the estimate online, where they can approve, reject, or request changes. They can also download a PDF.
Collecting Deposits
If you require an upfront payment before starting work, add a deposit to the estimate. When the client approves and pays the deposit, FieldCamp tracks the amount and automatically deducts it when you create the invoice later.
See Deposits for the full setup guide.
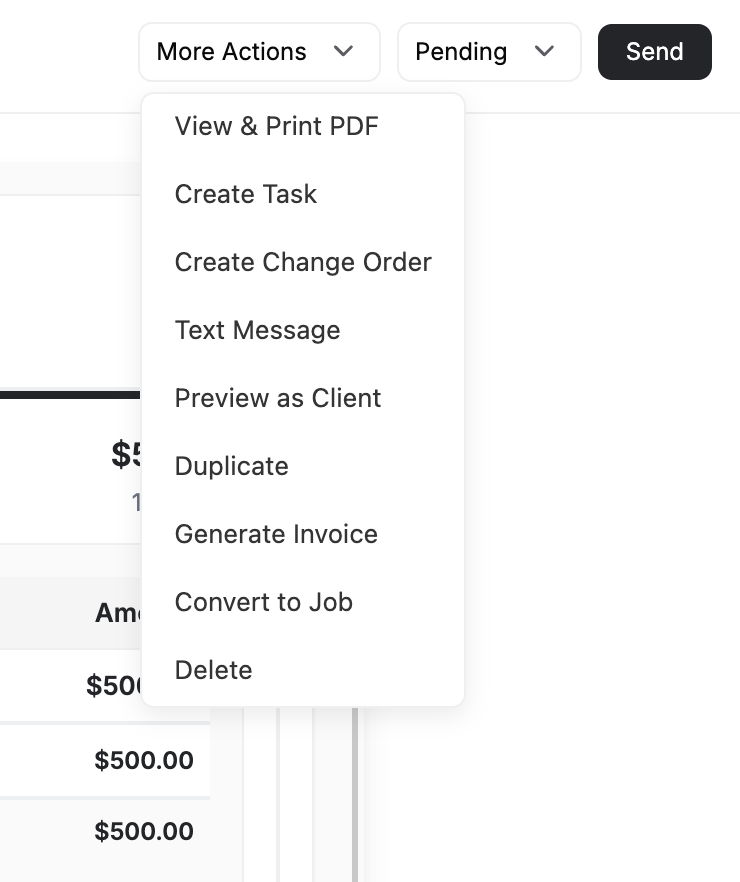
Converting an Approved Estimate
Once a client approves, the typical next step is converting the estimate into a job:
- Open the approved estimate
- Click Convert to Job
- All line items, pricing, and client details carry over
- Schedule the job and assign your team
For the complete conversion walkthrough, see Estimate to Job or the full Estimate to Job to Invoice flow.
Multi-Option Estimates
Sometimes a single price does not fit. Multi-option estimates let you present two or more pricing tiers on the same estimate so the customer can choose the one that works for them.
Example: You quote a homeowner three options for a bathroom remodel:
| Option | Description | Total |
|---|---|---|
| Option A -- Basic | Standard fixtures, vinyl flooring | $4,200 |
| Option B -- Mid-Range | Upgraded fixtures, tile flooring | $6,800 |
| Option C -- Premium | Designer fixtures, heated floors, glass shower | $11,500 |
The customer reviews all three and approves the one they want -- no back-and-forth emails needed.
Enabling Multi-Option Mode
- Open a new or existing estimate
- Toggle Multi-Option at the top of the estimate form
- FieldCamp converts the current line items into Option 1 and adds tabs for managing options
Adding Options
Click Add Option to create a new option. You have three choices:
| Method | What it does |
|---|---|
| Blank | Starts an empty option -- add your own line items |
| Copy existing | Duplicates an existing option so you can adjust pricing or swap items |
| From template | Loads a saved option template with pre-configured line items |
Each option has its own line items, subtotal, tax, and total. Options are color-coded so you can tell them apart at a glance.
Reordering, Duplicating, and Deleting Options
- Reorder -- Drag the option tabs to change the display order
- Duplicate -- Click the option menu and select Duplicate to copy it
- Delete -- Click the option menu and select Delete (you must keep at least one option)
What the Customer Sees
When you send a multi-option estimate, the customer sees all options laid out side by side (or stacked on mobile). They review the descriptions and totals, then click Approve on the option they prefer. Only the selected option moves forward when you convert to a job.
Save your most common option setups as templates for reuse. See Estimate Options and Templates for the full guide.
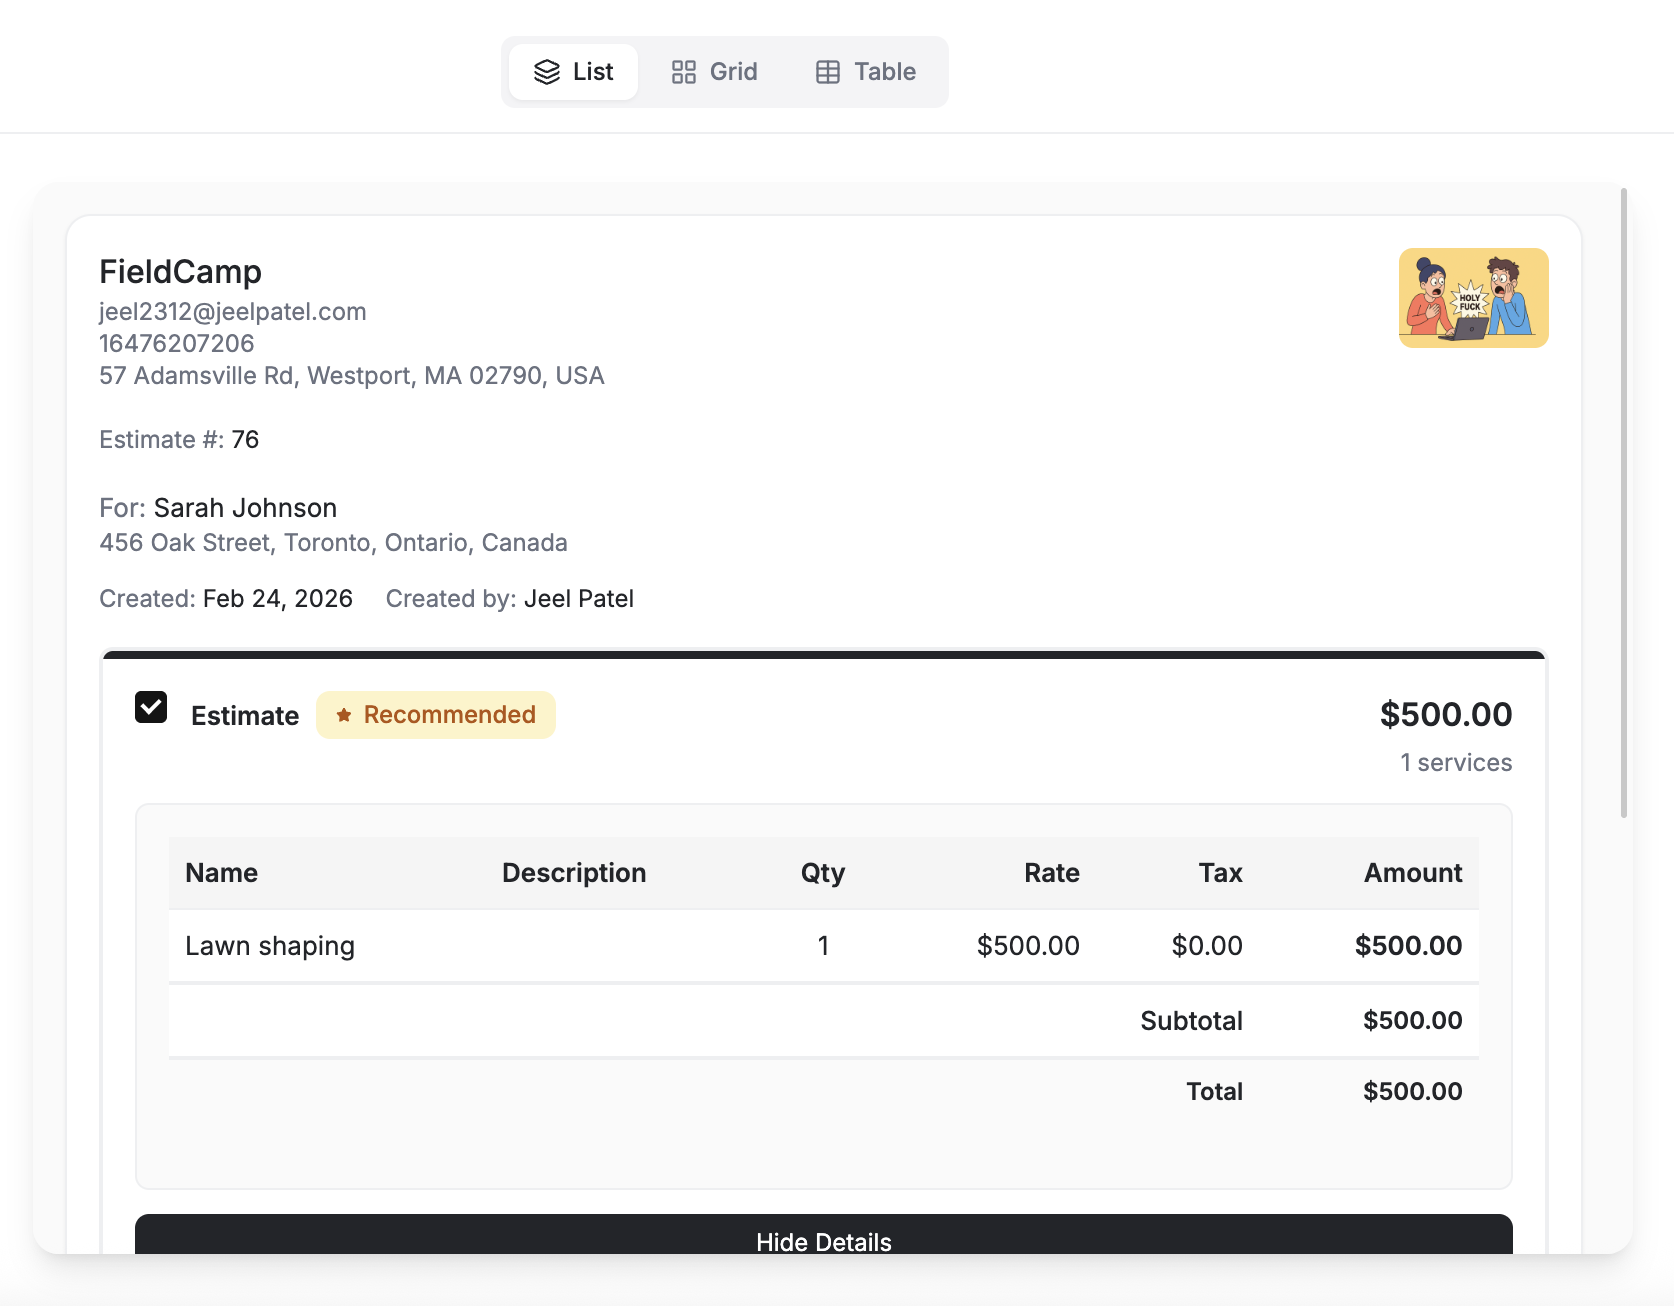
What Your Customer Sees (Document View)
When you send an estimate by email, the client receives a link to view it online. The document view is a clean, branded page that shows:
- Your company logo, name, and contact information
- The estimate number, date, and expiration date
- All line items (or all options, if multi-option is enabled) with descriptions, quantities, rates, and totals
- Tax, discounts, and the grand total
- Any customer-facing notes, terms, and attachments
From this page the customer can:
| Action | How it works |
|---|---|
| Approve | Click Approve (or select an option first if multi-option). If a digital signature is required, the customer signs before confirming. |
| Reject | Click Reject and optionally leave a reason |
| Request changes | Reply to the email or leave a comment explaining what they want adjusted |
| Download PDF | Click Download to save a PDF copy |
Once the customer approves, the estimate status updates to Approved and you can proceed to convert it to a job.
Change Orders
Change orders happen when the customer approves your estimate but then the scope changes — extra work discovered on-site, upgraded materials requested, or a new room added to the project. FieldCamp handles this without creating a new estimate from scratch.
When to Use a Change Order
- Customer approved the original estimate but now wants additional work
- Technician discovers unexpected issues on-site (e.g., water damage behind a wall during an HVAC install)
- Customer upgrades materials mid-project (standard thermostat → smart thermostat)
- Scope reduction — customer decides to skip part of the work
How to Create a Change Order
- Open the approved estimate
- Click Revise Estimate to unlock editing
- Make your changes:
- Add line items for new work or materials
- Remove line items that are no longer needed
- Adjust quantities or pricing on existing items
- Add a new option if you want the customer to choose between the original and revised scope
- Add a note explaining what changed and why (visible to the customer)
- Click Save and Re-send — the customer receives the updated estimate for approval
What Happens After
- The revised estimate keeps a version history linking back to the original
- The customer sees the updated total and can approve or reject the changes
- If approved, the updated line items flow through to the job and eventual invoice
- Original estimate status changes to Revised
Change orders are common in construction, renovation, and complex service work. Using FieldCamp's revision feature instead of creating a new estimate keeps everything linked — the customer sees one conversation thread, and your team has a clear audit trail of scope changes.
Example
Sarah Johnson approved a $2,500 bathroom renovation estimate. During demolition, the team discovers water damage that needs repair first.
- Open Sarah's approved estimate
- Click Revise Estimate
- Add a new line item: "Water Damage Repair — $800"
- Add a note: "Water damage discovered behind shower wall during demolition. Repair required before tile installation can proceed."
- Re-send — Sarah sees the updated total ($3,300) and can approve the additional work
Managing Estimates
Preview
Click Preview to see the estimate exactly as your client will see it -- branded layout, pricing breakdown, terms, and approval buttons.
Edit
You can edit an estimate when it is in Draft, Sent, or Viewed status. Once an estimate is Approved or Converted, it locks to preserve the agreed terms.
Duplicate
Click Duplicate to create a copy with a new estimate number and today's date. Useful for quoting similar work for a different client or property.
Delete
Draft estimates can be deleted. Sent estimates should be voided rather than deleted to maintain your audit trail.
Digital Signatures
You can require your signature, the client's signature, or both on any estimate. See Digital Signatures for setup details.
Use the Estimate Views and Analytics dashboard to track your pipeline -- see conversion rates, pending approvals, and total quoted value at a glance.
Related Articles
- Estimate Options and Templates — multi-option quotes and reusable templates
- Estimate to Job to Invoice — convert approved estimates into jobs and invoices
- Contracts, Terms, and Attachments — add legal terms and files to estimates
- Digital Signatures — require client signatures on estimates
- Tax Settings — configure tax rates for your estimates and invoices
Calendar Sync & Preferences | FieldCamp
Connect FieldCamp to Google Calendar or Outlook with two-way sync. Customize event colors, labels, and dispatcher display settings for your field service team.
Estimate Options & Templates | FieldCamp
Create multi-option estimates and quotes in FieldCamp so customers can choose between pricing tiers. Save option templates for reuse across all estimates.