 FieldCamp
Client Detail Page | FieldCamp
View and manage all client information from one page in FieldCamp — contact details, jobs, emails, payments, files, custom fields, and communication history.
Under the hood — see how Customers work in the FieldCamp data model: the fields they hold, how they connect to your other records, and how to customize them.
The client detail page is where you manage everything about a single client. It is organized into tabs so you can find exactly what you need — contact details, job history, email conversations, files, or payment information.
Quick access: Open the Command Centre and type "Show me client Sarah Johnson" to jump straight to their detail page. See AI Skills for more ways the AI helps with client management.
Opening the Client Detail Page
Click on any client row in the table view, or click on a client card in Kanban view. The full detail page opens, showing all the information and options available for that client. You can also search for any client using the quick search (CMD+K / Ctrl+K) at the top of the screen.
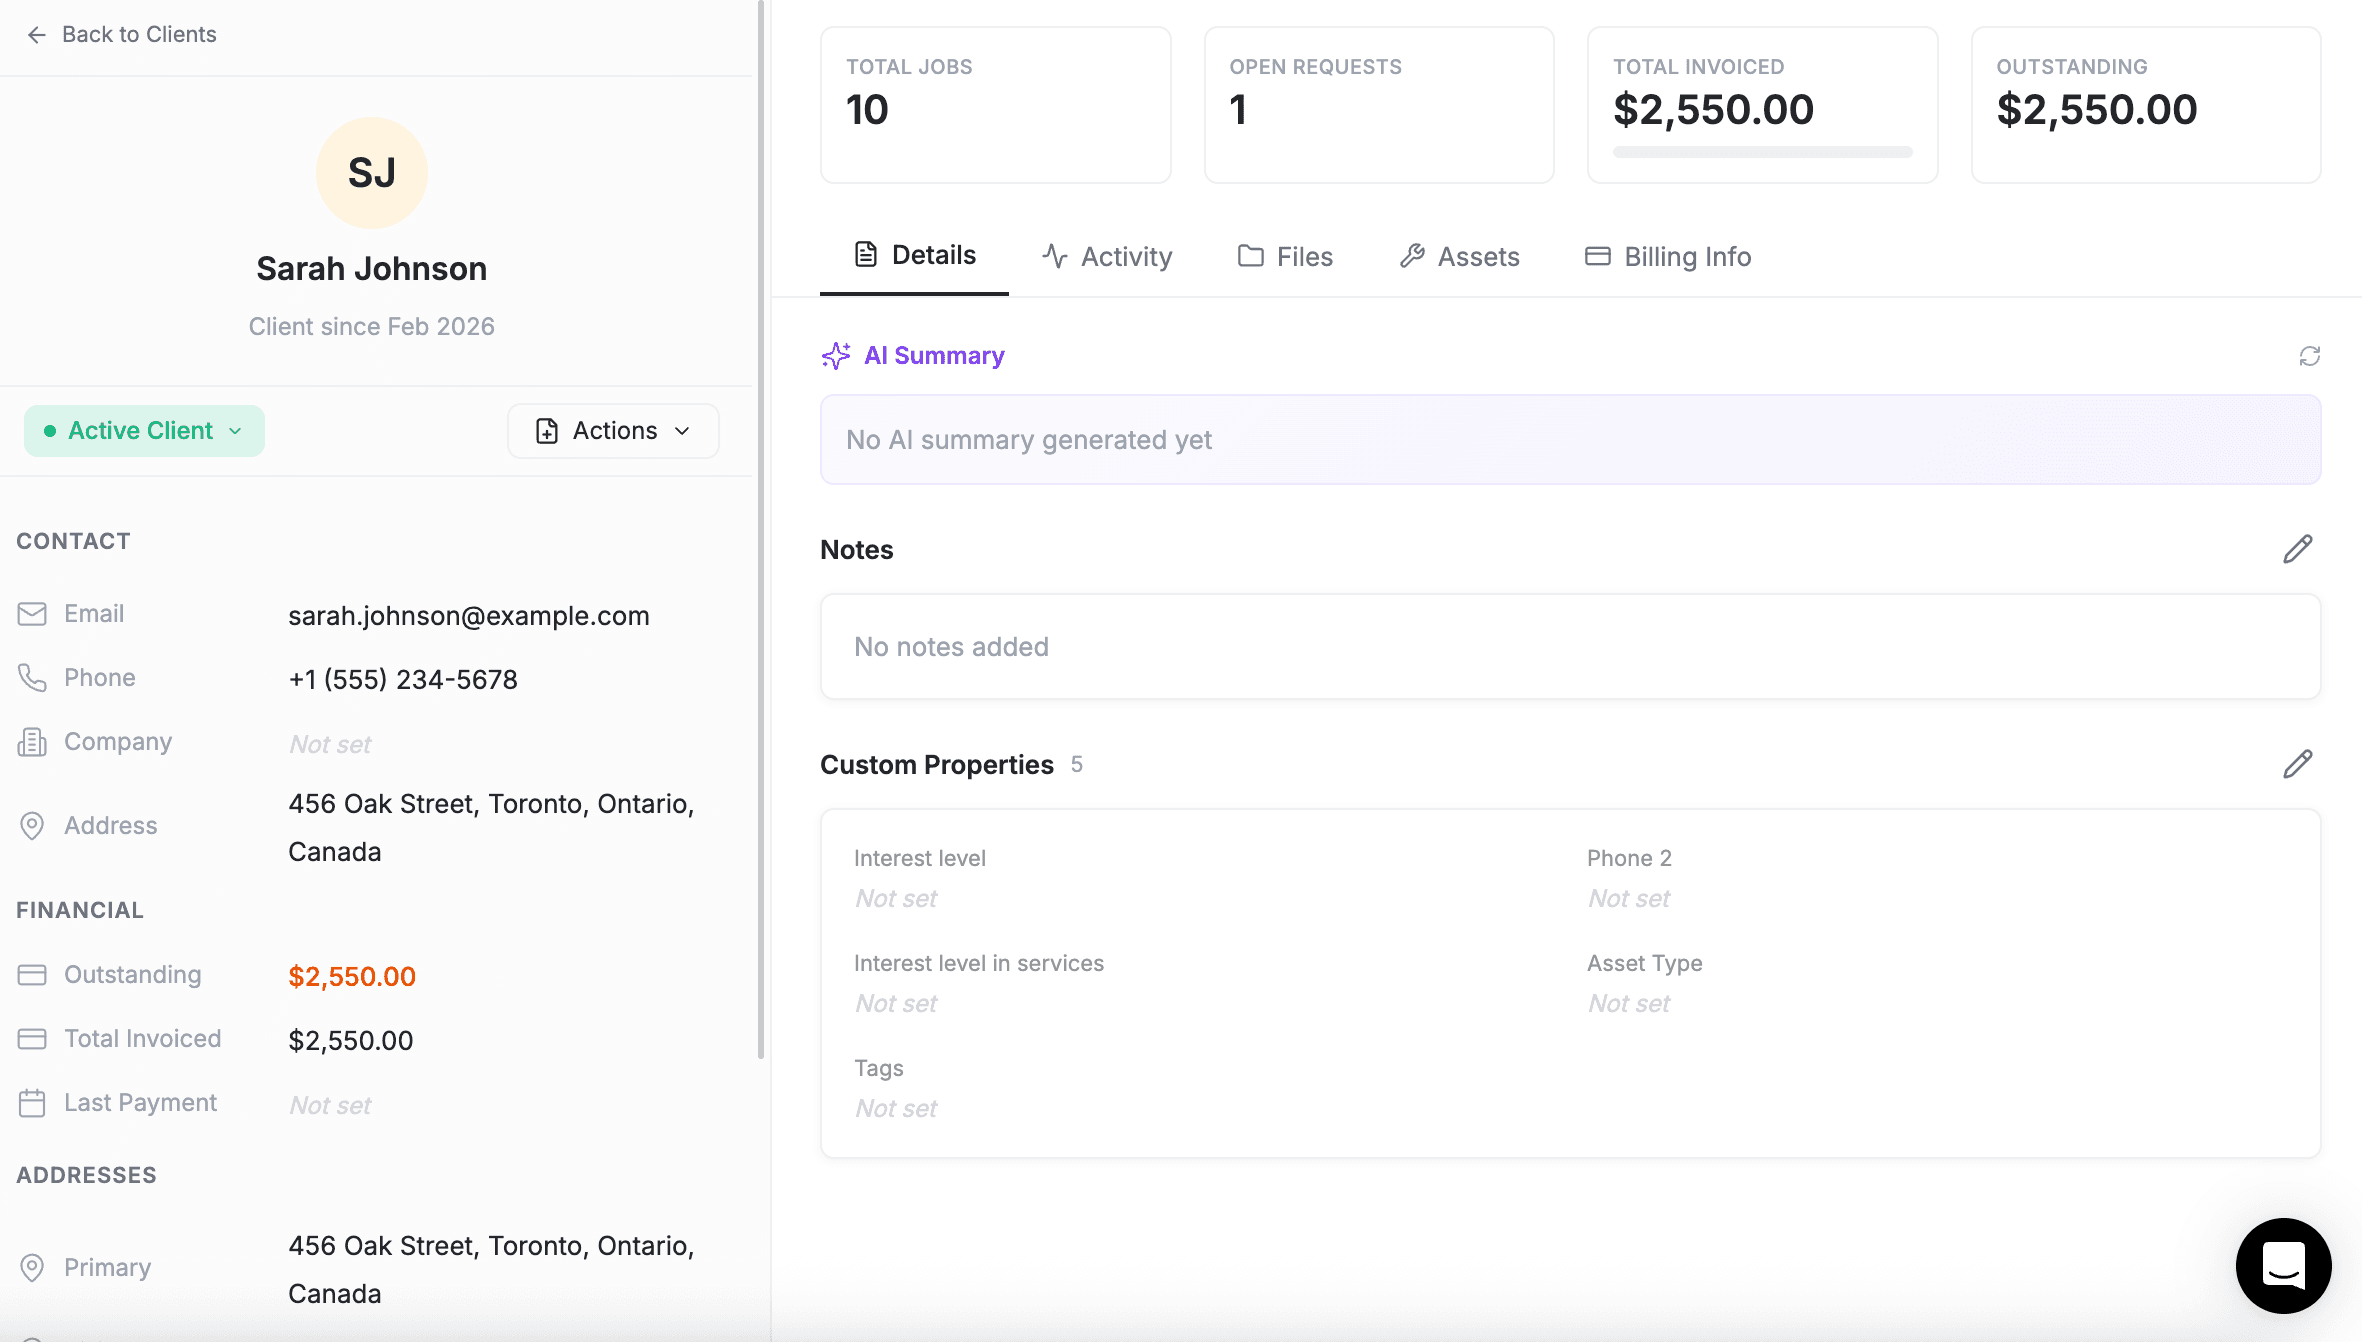
Client Overview Widgets
At the top of every client card, four metric widgets give you a quick snapshot:
-
Total Jobs — Number of jobs linked to this client
-
Open Requests — Active service requests from this client
-
Total Invoiced — Sum of all invoices generated for this client
-
Outstanding Amount — Unpaid balance across all invoices
You can also initiate a call or SMS directly from the client card header using the phone and message icons (requires the Calls add-on to be enabled).
Client Tabs
The client card is organized into tabs. Which tabs you see depends on your permissions and which add-ons are enabled.
Details
This is the main information tab where you manage all the client's core data.
-
Name — Click to inline edit the first and last name
-
Email — Contact email address
-
Phone — Phone number with country code selector
-
Website — Company or personal website URL
-
Stage — Current stage shown with a colored badge (like "Active Client" in green or "New Lead" in blue). Click the dropdown to change their stage
-
Lead Source — Where this client came from (referral, website, ads, etc.)
-
Client Type — Business or Individual
-
Tax ID / VAT — Tax number or VAT registration number for invoicing and compliance
-
Preferred Technicians — Assign preferred team members for routing future jobs
-
Addresses — View, edit, or add property address, company address, and billing address. Each address includes Google Maps autocomplete for accuracy
-
Custom Properties — Any custom fields you've created for your business (industry type, source, budget, etc.)
-
Tags — Colored badge labels that appear in their own TAGS group in the client sidebar. Each tag has a name and a color. Tags are used to label and categorize clients (e.g., "VIP", "Seasonal", "Referral") and show up as colored badges on the client record. Tags are separate from custom properties and are managed independently.
-
Notes — Internal notes about this client visible only to your team
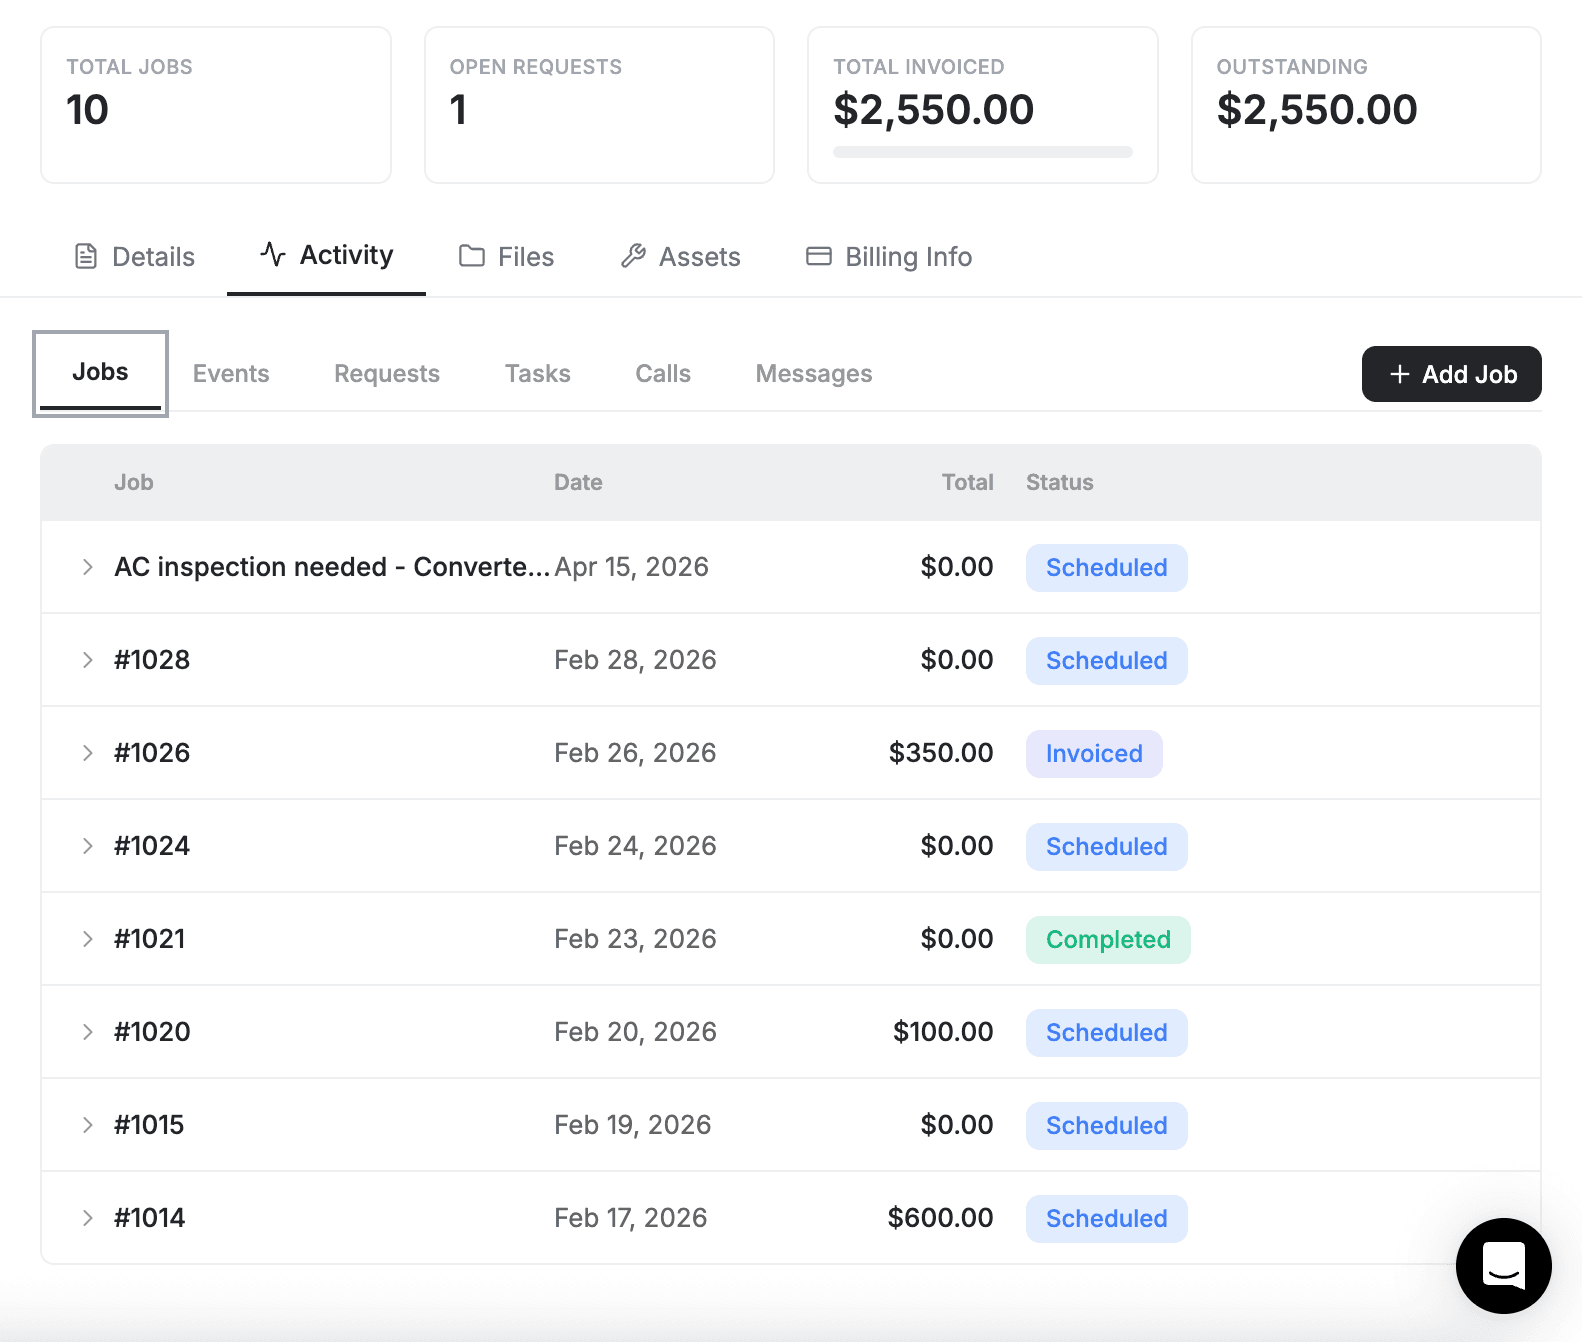
Activity
This tab shows the work you've done and plan to do with this client. It displays:
-
Linked Jobs — All jobs associated with this client. Each job shows:
-
Job status (colored badge like "Scheduled," "In Progress," "Completed")
-
Job name
-
Amount (formatted with currency)
-
Date and time
-
Assigned person's name
-
-
Linked Requests — Service requests from this client with their current stage
-
Expandable Jobs — Click any job to see the visits and details within it
-
Create New Job — Click this button to create a new job for this client right from their card
-
Pagination — Shows 10 items per page. Navigate through pages to see older jobs and activity
The Activity tab also contains sub-tabs for related items:
-
Jobs — All jobs for this client
-
Events — Calendar events linked to this client (visible to admins with Google Calendar or Outlook connected). Shows event title, date, time, and a link to the originating calendar event
-
Requests — Service requests from this client
-
Tasks — Tasks linked to this client
-
Calls and Messages — Available when the Calls & Messaging add-on is enabled
Emails
This tab centralizes all email communication with this client.
-
Email Threads — Each email conversation shows sender name, subject, preview text, read/unread indicator, and attachment badge
-
Multi-Select — Use checkboxes to select multiple emails
-
Compose New Email — Click to send a new email to this client
-
Mark as Read/Unread — Bulk actions for selected emails
-
Delete — Remove emails (be careful — this is permanent)
Messages
View and send SMS/text messages to this client. Shows the full message thread with timestamps. Requires the Calls & Messaging add-on.
Calls
View call history with this client — including call date, duration, outcome, and any notes logged during or after the call. You can also initiate calls directly from this tab. Requires the Calls & Messaging add-on.
Tasks
Create and manage tasks related to this client. Each task shows its title, due date, assigned team member, and completion status. Use this to track follow-ups, reminders, or to-dos tied to a specific client.
Files
Store and manage all files associated with this client.
-
Upload Files — Click to add documents (quotes, contracts, photos, etc.)
-
File List — See all files uploaded for this client with upload date and uploader name
-
Download or Delete — Access files or remove them as needed
Documents
View estimates and invoices linked to this client. You can also use the AI Document Chat feature to ask questions about the client's documents.
Drive
Access cloud-stored files linked to this client through integrated cloud storage.
Products
View products and services associated with this client. Shows items from past jobs and frequently used products for quick reference when creating new jobs or estimates.
Assets
Track physical assets or equipment belonging to this client (if your business manages client assets).
-
Add Assets — Log items like equipment, furniture, tools, or property details
-
Asset Details — View and manage information about each asset linked to this client
Job Forms
View completed digital checklists and forms from jobs done for this client. Requires the Job Forms add-on.
Payments
View payment history for this client — all payments received across invoices, including payment date, amount, and method.
Billing Info
Manage payment methods and billing for this client.
-
Payment Methods — View payment methods stored for this client (credit/debit cards from Stripe)
-
Card Information — For each saved card, you see card brand, last 4 digits, and expiration date
-
Add Card — Click to securely add a new payment method
-
Delete Card — Remove a payment method (a confirmation dialog appears for safety)
Tab Visibility
Which tabs appear depends on your role, permissions, and enabled add-ons:
Tab
Requires
Details
Always visible
Activity
View history permission
Events (within Activity)
Admin role + Google Calendar or Outlook connected
Emails
Admin role + view history permission
Messages
Calls & Messaging add-on
Calls
Calls & Messaging add-on
Tasks
View history permission
Files
View history permission
Documents
View history permission
Drive
Cloud storage integration enabled
Products
View history permission + pricing permission
Assets
View assets + view history permission
Job Forms
Job Forms add-on
Payments
Pricing permission
Billing Info
Stripe connected to your account
Custom Object Tabs
If your FieldCamp workspace uses custom objects (special data types you define), additional tabs may appear on the client card. These are created based on your business needs and appear alongside the standard tabs.
Editing Client Information
To edit information on the Details tab:
-
Click the field you want to change (most fields are inline editable)
-
Type or select the new information
-
Click the Update button at the bottom to save all changes at once
Some fields have special editors:
-
Stage dropdown — Shows all available stages with color badges. Select one to change the client's status
-
Addresses — Include Google Maps autocomplete for accuracy
-
Phone number — Shows a country code selector
Tip: If you make a mistake, just click Update again with the correct information. Changes take effect immediately when you save.
Deleting a Client
Click the Delete button at the bottom of the card. A confirmation dialog will appear asking "Are you sure?" — this is permanent, so be careful.
Warning: Deleting a client removes them and all associated data from FieldCamp. You cannot undo this action. If you don't need them anymore but might reference them later, consider moving them to the Archived stage instead.
Permissions and Access
What you can see and edit depends on your user role:
-
Administrators — Can view and edit any client
-
Managers — Can view and edit clients assigned to them or their team
-
Users — Can view and edit clients assigned directly to them
If you don't see an Update button or editing options, you may not have permission to edit this client. Contact your administrator if you need access.
Key Actions Summary
-
Change Stage — Click the stage dropdown on the Details tab
-
Create a Job — Click "Create New Job" on the Activity tab
-
Send an Email — Click "Compose New Email" on the Emails tab
-
Send a Text — Go to the Messages tab and compose
-
Make a Call — Click the phone icon in the header or go to the Calls tab
-
Create a Task — Click "Add Task" on the Tasks tab
-
Upload a File — Click the upload area on the Files tab
-
Add a Payment Method — Click "Add Card" on the Billing Info tab
Pro Tip: Use the Activity tab frequently to see what you've already done with a client. This prevents duplicate work and helps you remember where you left off.
Related Articles
- Creating Clients — Add new clients via AI or manually
- Editing Client Info — Update names, emails, addresses, and custom fields
- Actions Menu — Add jobs, tasks, estimates, and invoices from the detail page
- Categories & Stages — Move clients through your sales pipeline
- Custom Fields — Track business-specific information on each client
How to Create a Client | FieldCamp
Add new clients to FieldCamp using the AI Command Centre, the manual form, or CSV import. Learn required fields, optional details, and automatic creation.
Edit Client Information | FieldCamp
Update client details like name, email, phone, address, and custom fields in FieldCamp. Edit inline in the table view, from the detail page, or with bulk actions.