 FieldCamp
Quick Start — Set Up Your Business | FieldCamp
Set up FieldCamp in 15 minutes. Configure your company profile, connect email and Stripe, invite your team, and start scheduling field service jobs step by step.
Under the hood — the FieldCamp data model shows how every record connects, how you can customize it, and how it maps to your trade.
Get Your Business Running in 15 Minutes
This guide walks you through the essential setup steps to get FieldCamp ready for your business. Follow these steps in order for the fastest path from sign-up to scheduling your first job.
Before you start: Make sure you have created your FieldCamp account. If you chose "Business Setup" during onboarding, some of these steps may already be complete.
Step 1: Set Up Your Company Profile
Go to Settings → Company Details and fill in your business information:
-
Company name — appears on invoices, estimates, and customer-facing documents
-
Logo — upload your company logo (recommended size: 300×300px)
-
Address — your main business address
-
Phone number and website
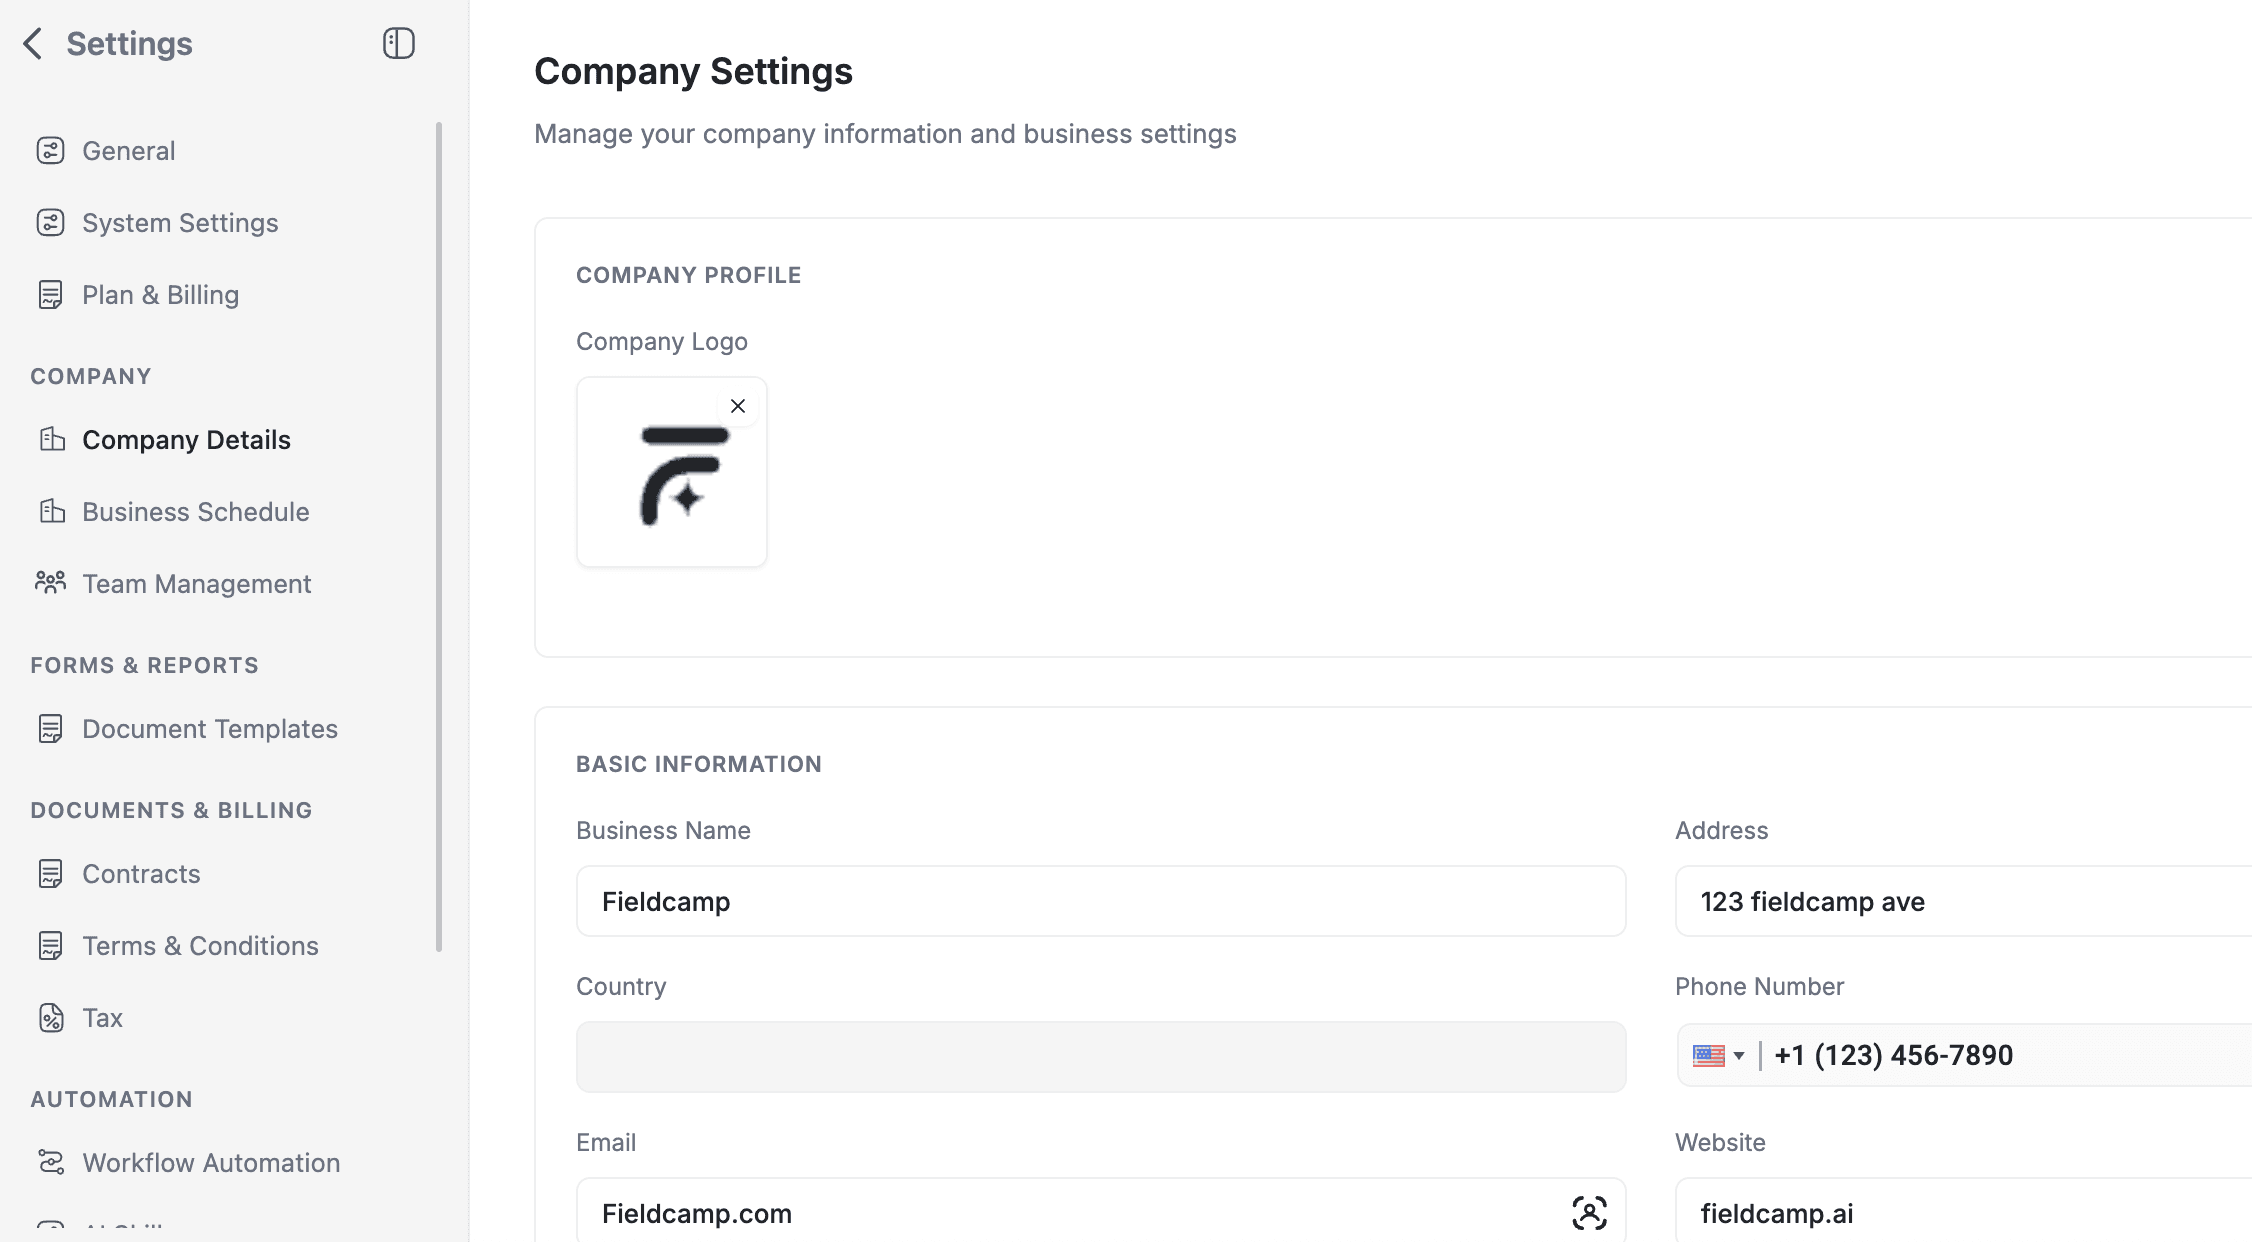
Your company details appear on invoices, estimates, and customer-facing documents.
Step 2: Configure Your Business Schedule
Go to Settings → Business Schedule and set your company's working hours for each day of the week. This schedule determines the default availability shown on the Calendar and is used by Online Booking to show available time slots to customers.
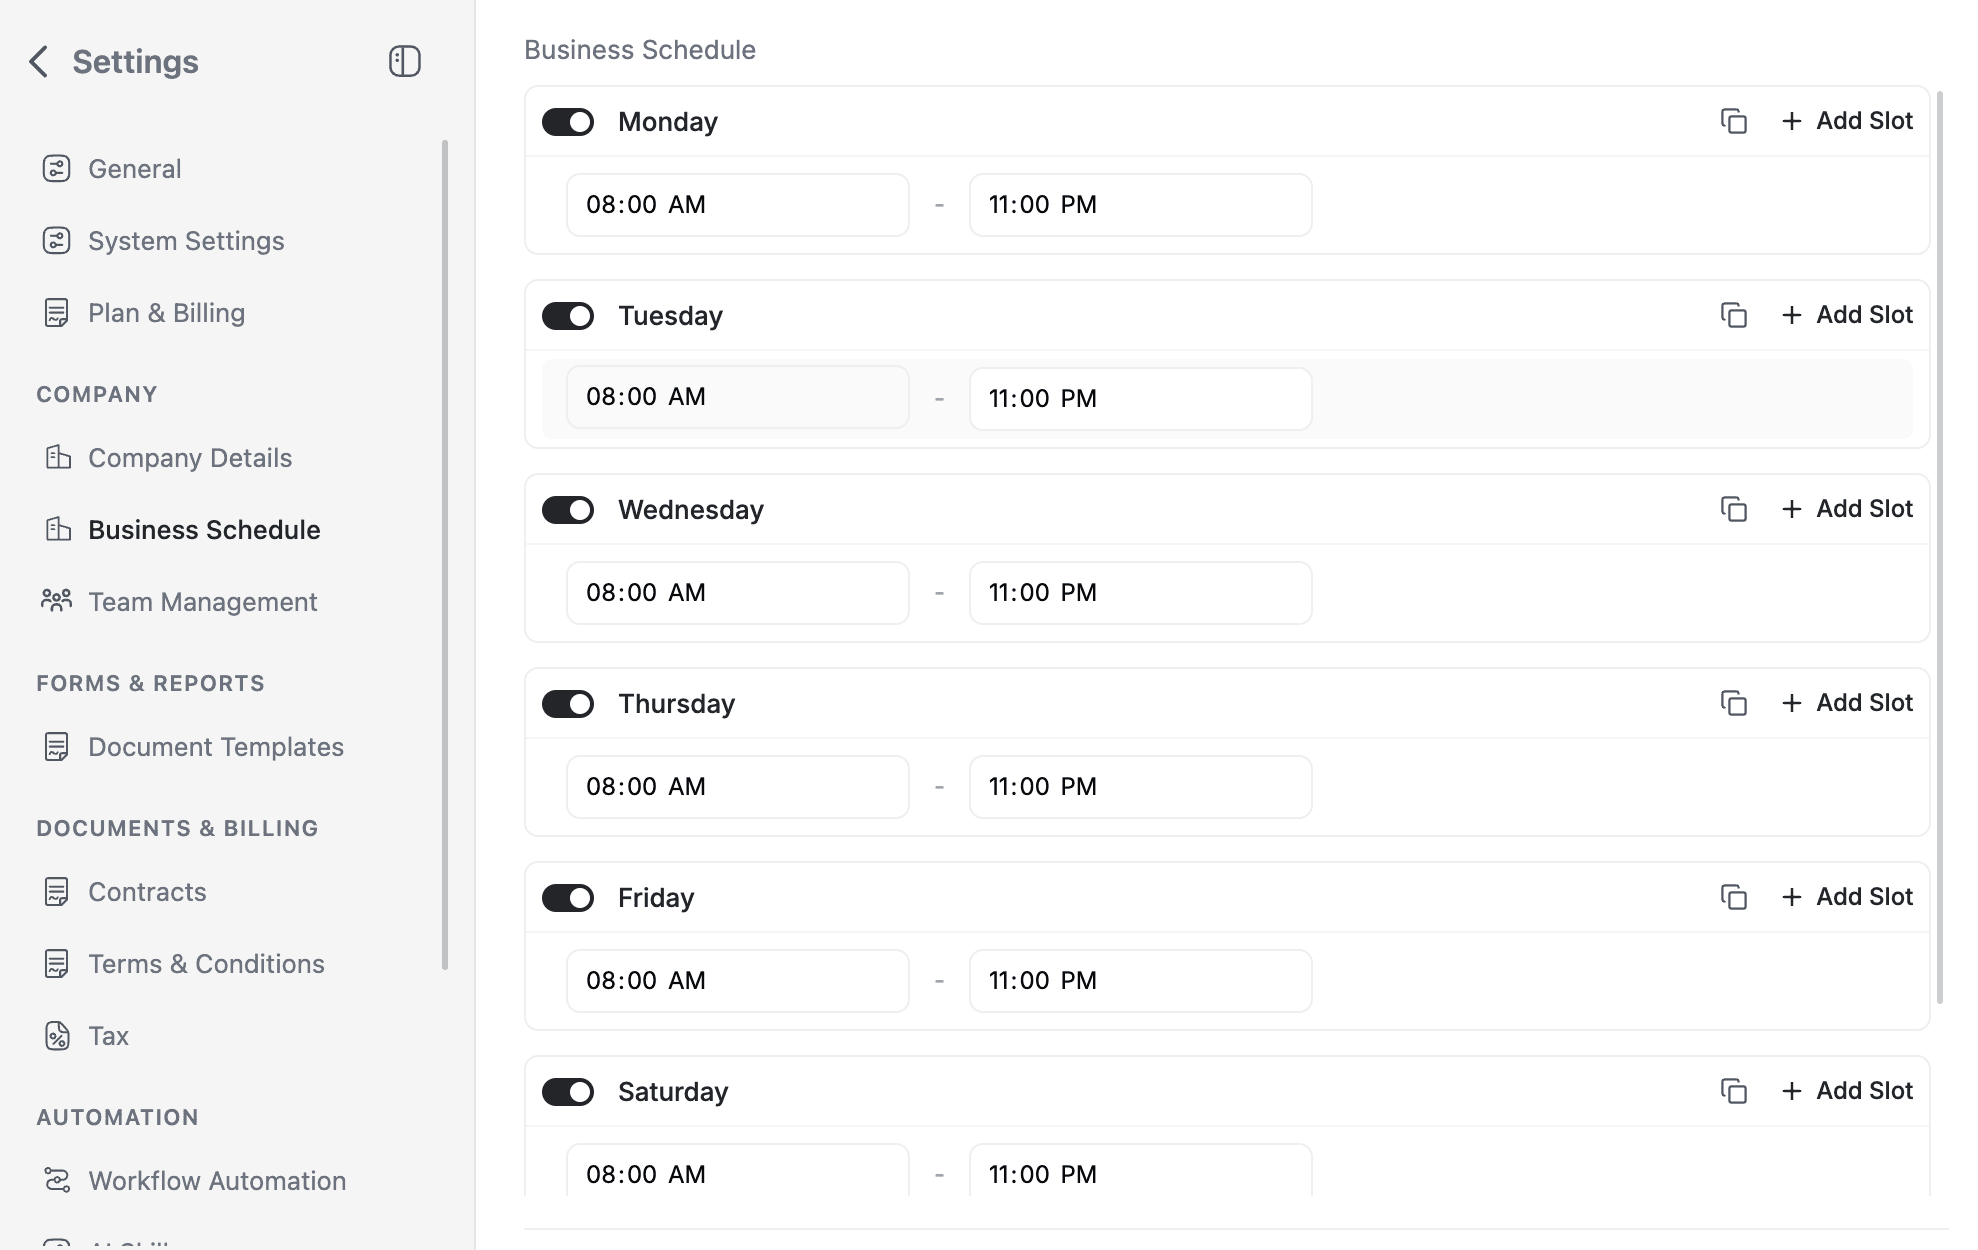
The default schedule is Monday through Friday, 9:00 AM to 5:00 PM. Adjust to match your actual business hours.
Step 3: Connect Your Email
Connect Gmail or Outlook so you can send and receive emails directly inside FieldCamp. This means customer replies to invoices, estimates, and notifications all appear in your Inbox.
-
Go to Settings → Apps & Integrations.
-
Find Gmail (or Outlook) and click Connect.
-
Sign in and grant the required permissions.
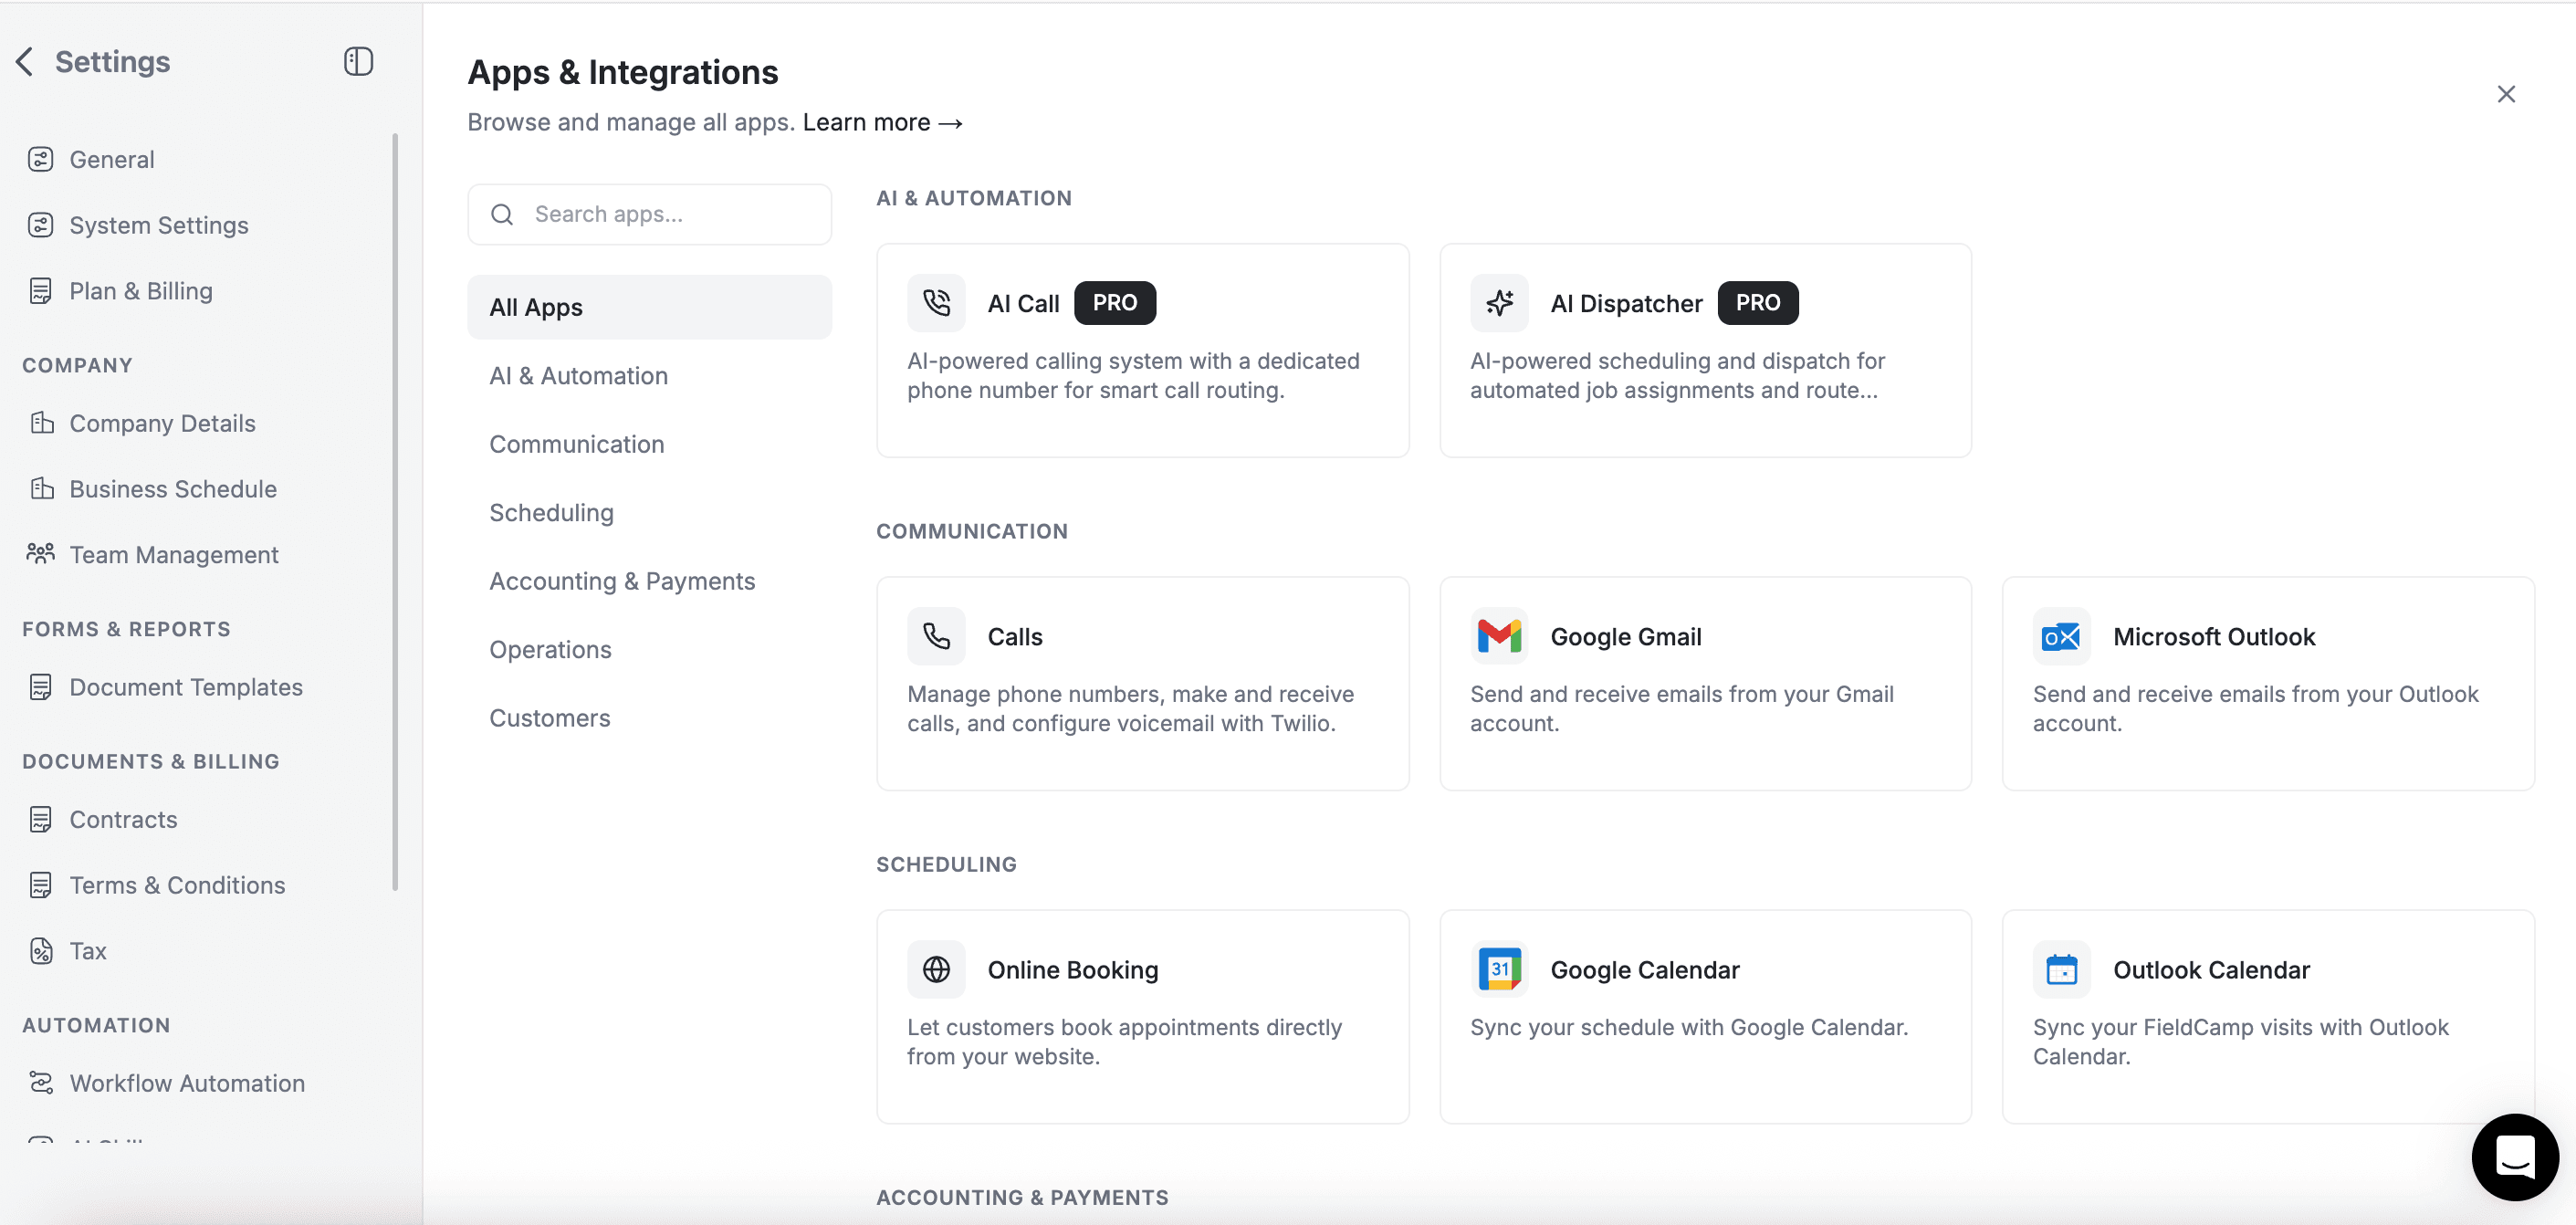
See the full setup guide: Connecting Gmail to FieldCamp.
Step 4: Connect Your Calendar
Sync your Google Calendar or Outlook Calendar so FieldCamp jobs appear alongside your personal events.
-
Go to Settings → Apps & Integrations.
-
Find Google Calendar (or Outlook Calendar) and click Connect.
-
Select which calendar to sync with FieldCamp.
See the full setup guide: Connecting Google Calendar.
Step 5: Set Up Payments
Connect Stripe so your customers can pay invoices online with a credit card. This is the fastest way to get paid.
-
Go to Settings → Apps & Integrations.
-
Find Stripe and click Connect.
-
Complete the Stripe onboarding (or connect your existing Stripe account).
See the full setup guide: Connecting Stripe for Online Payments.
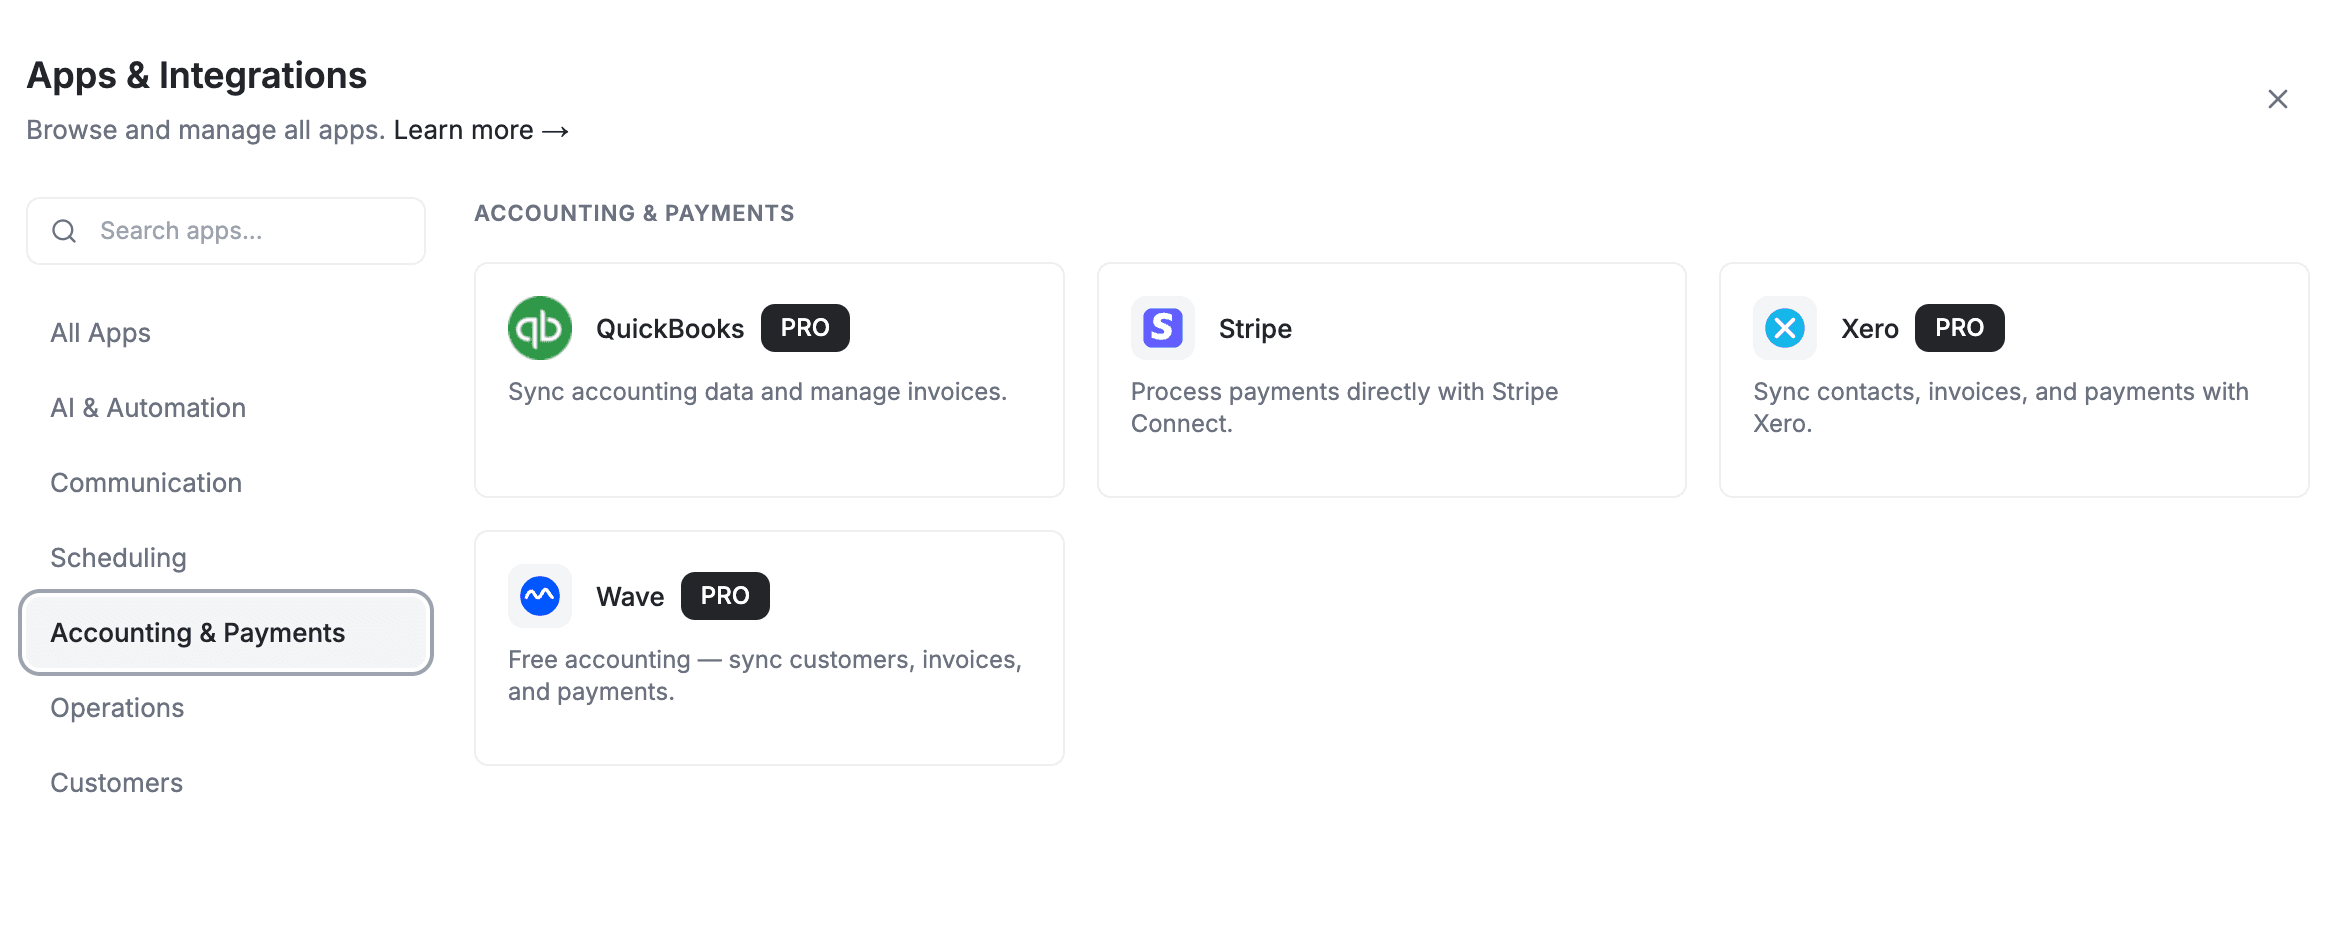
If you also use accounting software, connect QuickBooks, Xero, or Wave to keep your books in sync.
Step 6: Add Your Team
Invite team members so they can log in, see their assigned jobs, and update job statuses from the field.
-
Go to Settings → Team Management.
-
Click + Add Team.
-
Enter the team member's name and email address.
-
Assign a role (Admin, Dispatcher, Field Technician Pro, or Field Technician Lite).
-
Click Save.
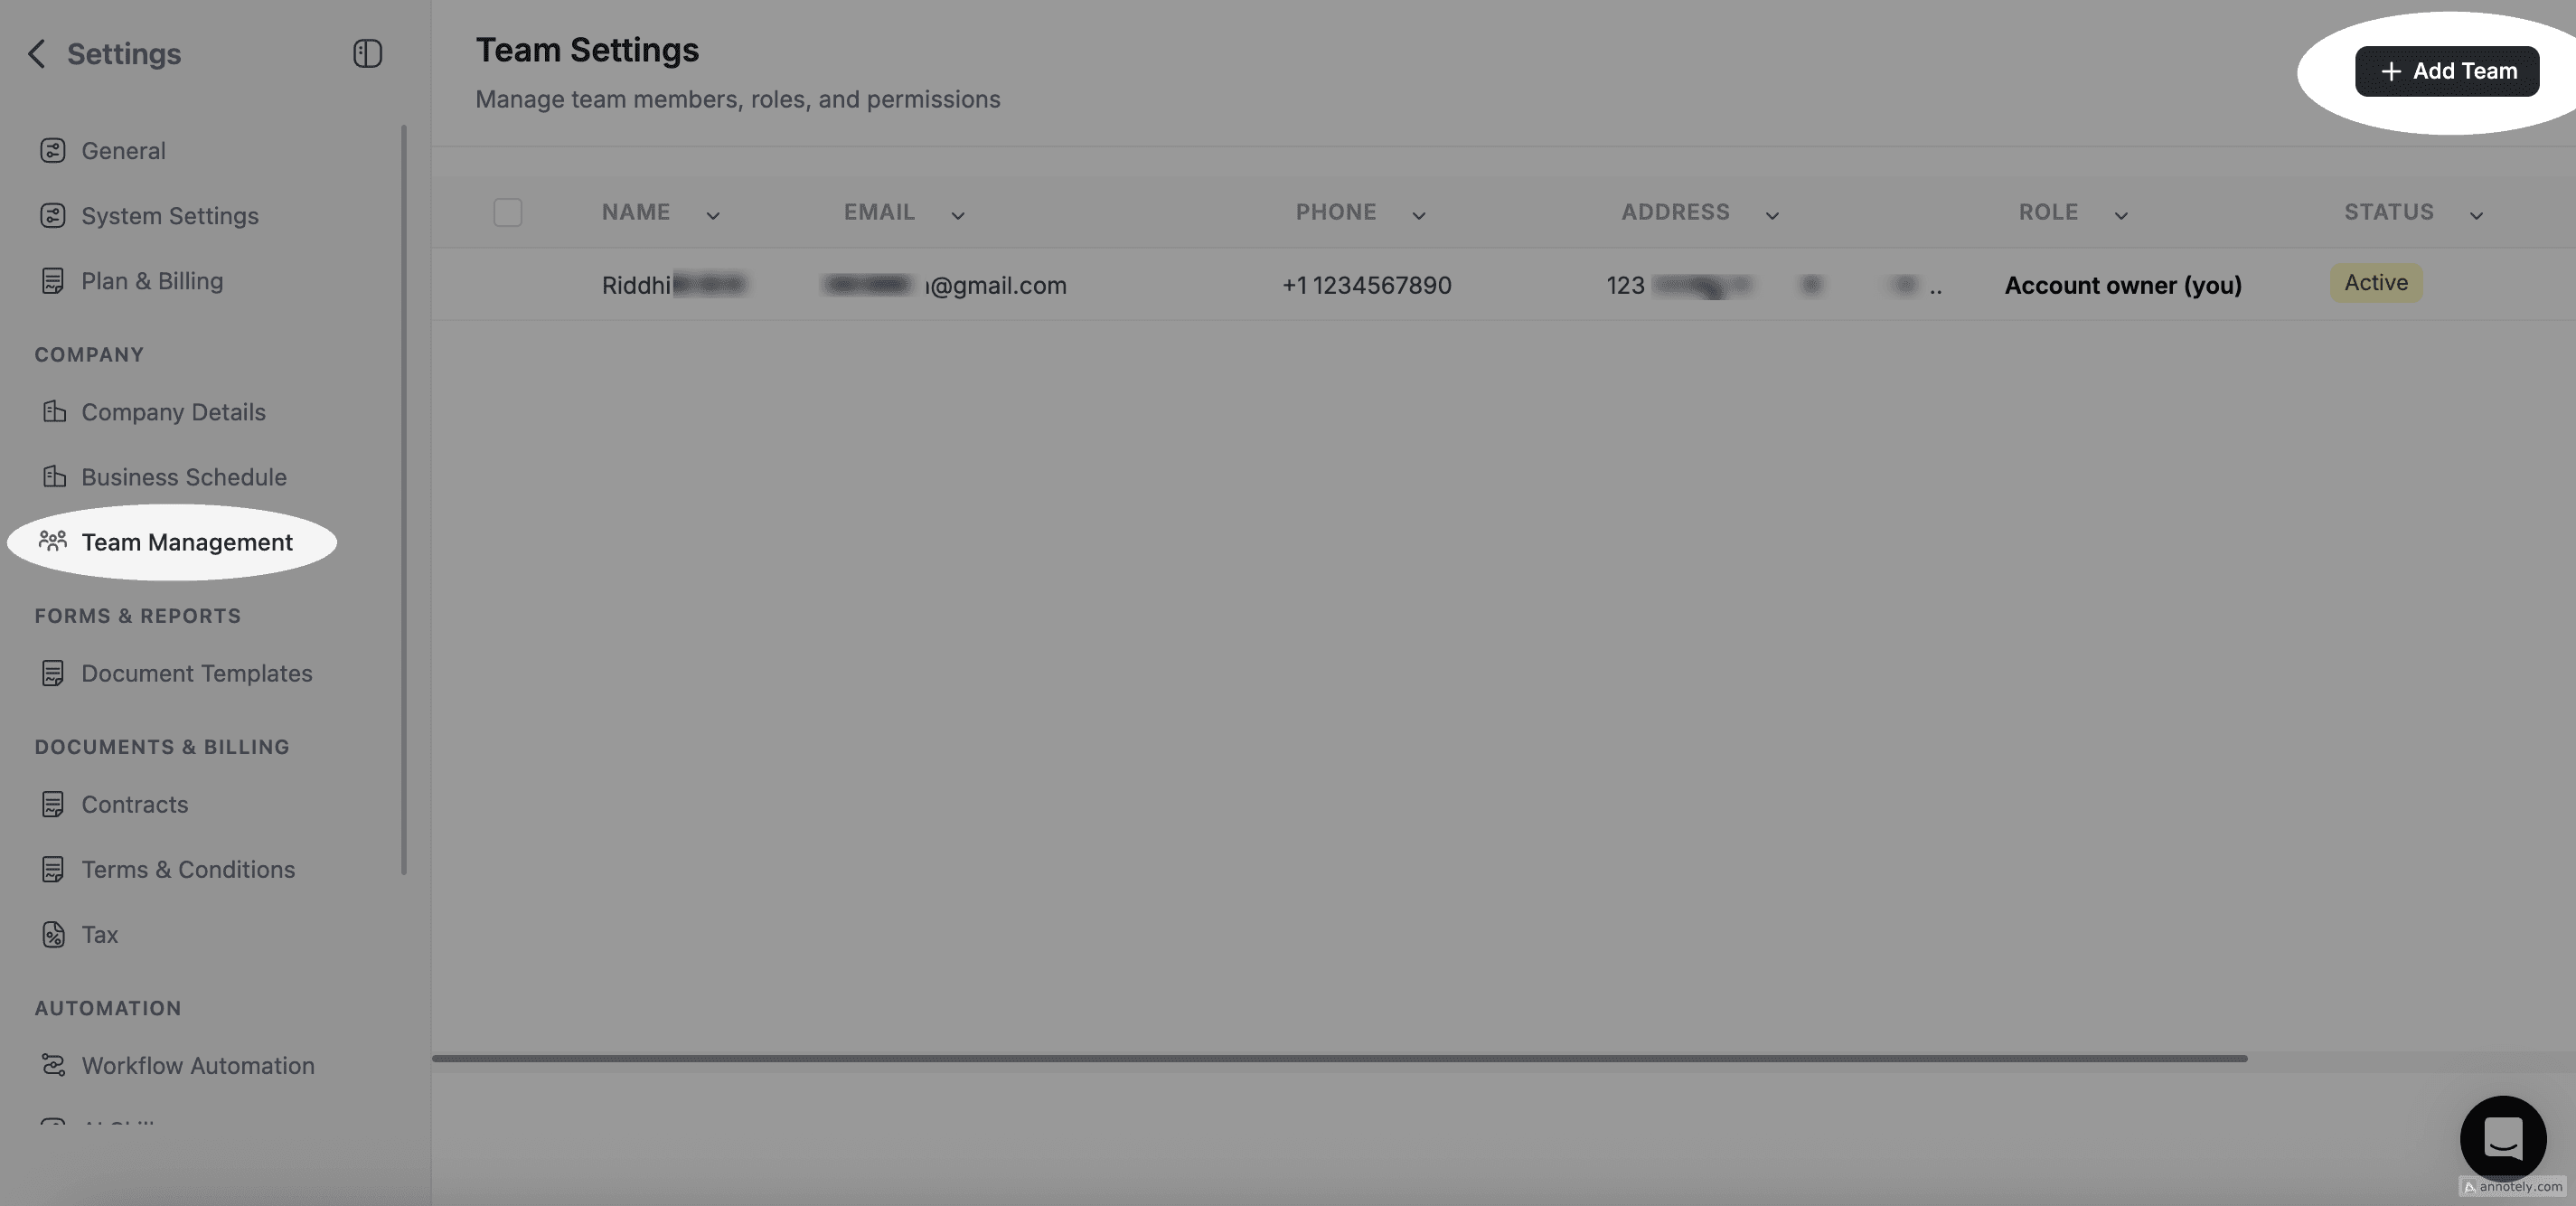
The team member receives an email invitation to join your workspace. For details on roles, see Roles & Permissions. For the full team setup guide, see Adding & Managing Team Members.
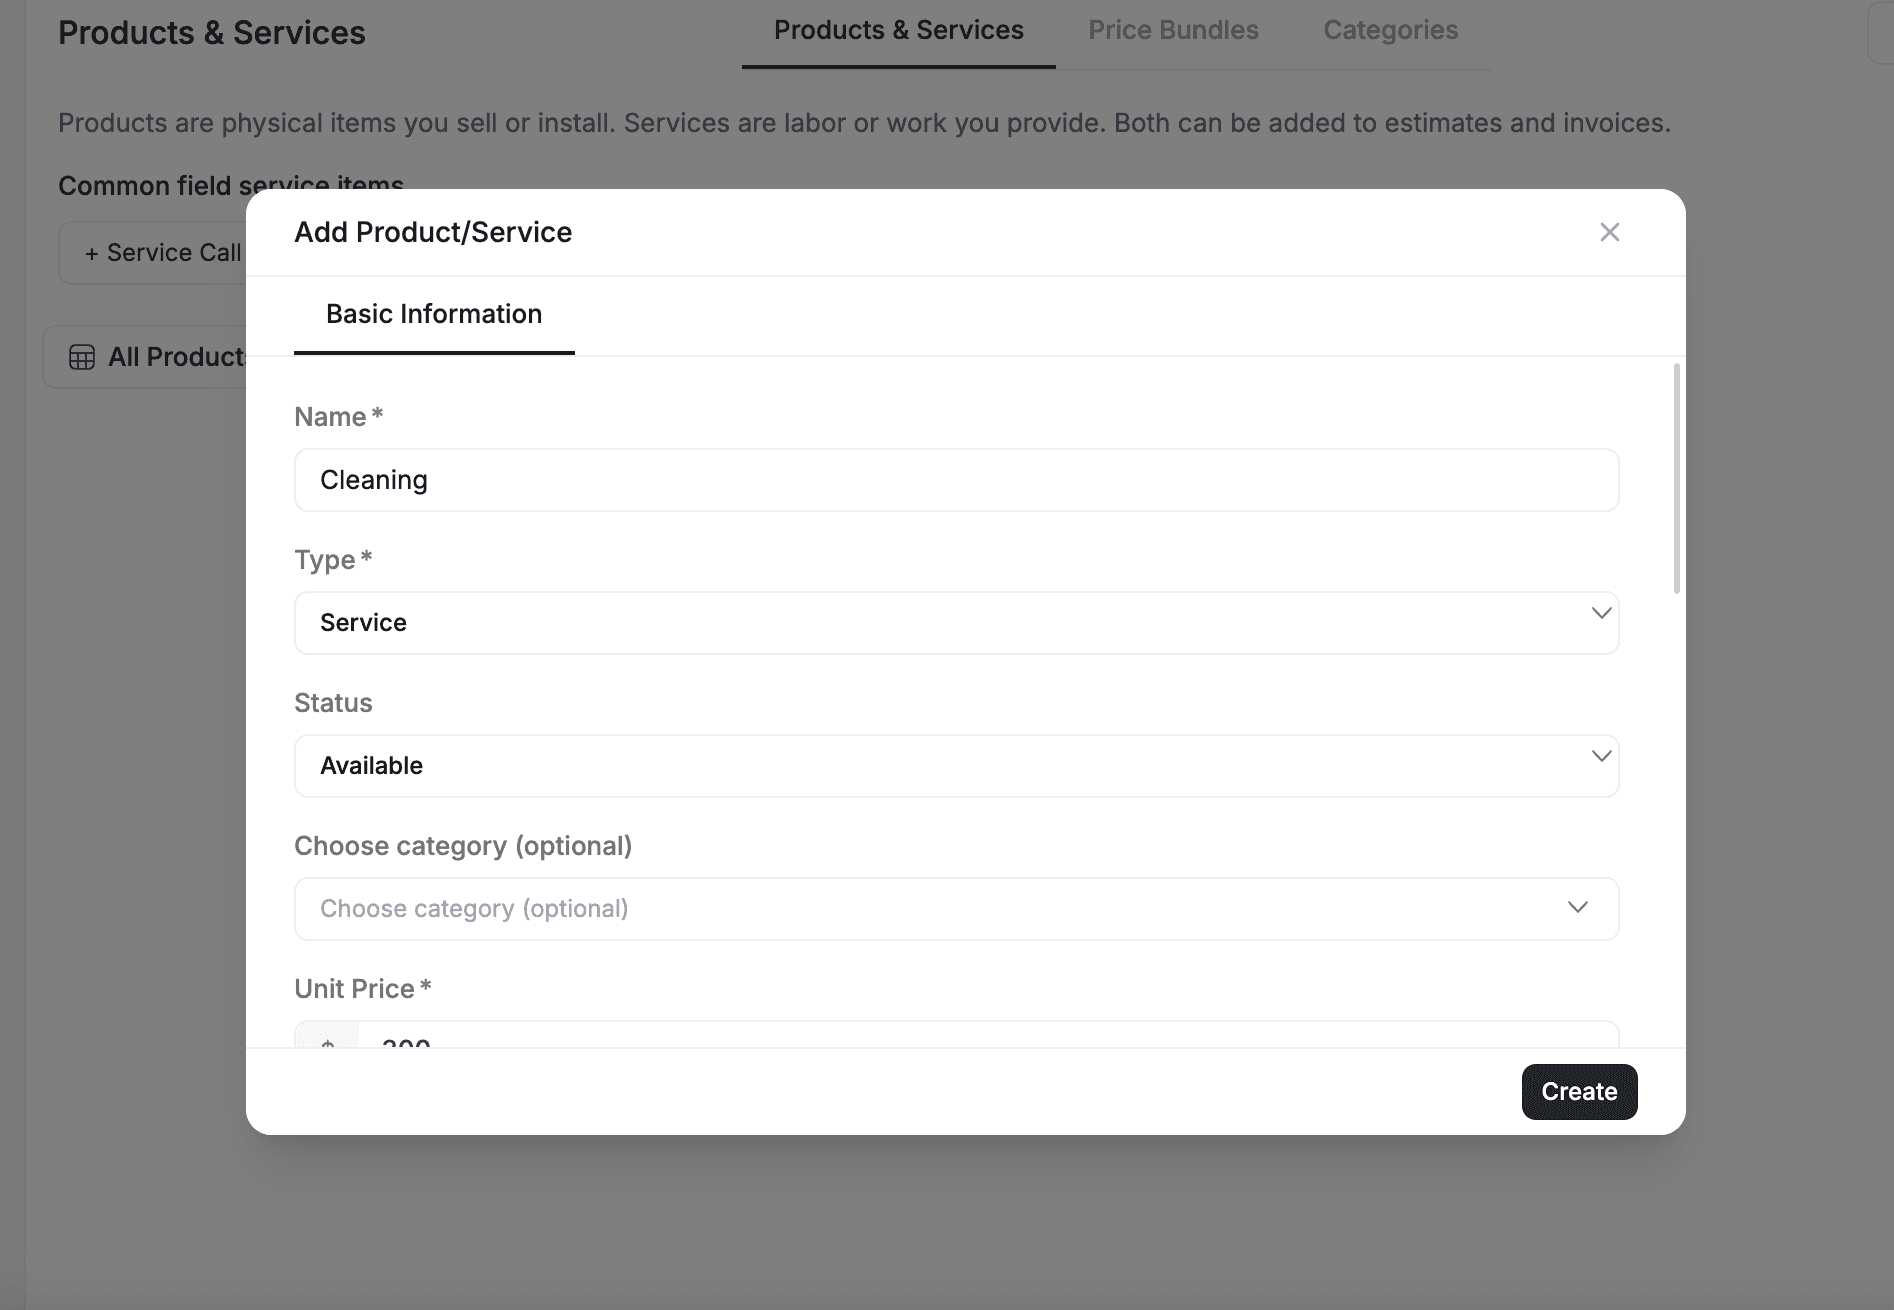
Step 7: Add Your Products & Services
Define the services you offer and products you sell. These become reusable line items when creating jobs, estimates, and invoices.
-
Click Products & Services in the sidebar under OPERATIONS.
-
Click + Add to create a new product or service.
-
Enter the name, description, price, and tax rate.
-
Click Save.
Step 8: Enable Add-Ons (Optional)
FieldCamp has optional add-ons that extend its capabilities. To enable them, go to Settings → Apps & Integrations and toggle on the ones you need. Here are the key add-ons:
- Online Booking — Let customers book appointments directly from your website, choosing their service, date, and time slot.
- AI Dispatcher — Automatically assign jobs to the best available technician based on skills, location, and availability.
- Job Forms — Create on-site checklists, inspection reports, and digital forms that technicians complete on the job.
- Customer Portal — Give clients a self-service dashboard to view jobs, approve estimates, and pay invoices.
- Workflow Automation — Set up rules that trigger actions automatically, like sending a thank-you email when a job is completed.
- Timesheets — Track your team's work hours, breaks, and overtime for accurate payroll and billing.
You can enable or disable add-ons at any time. See the complete list and details in the Add-Ons Guide.
Step 9: Start Using the Command Centre
This is the part where FieldCamp becomes unlike any other field service tool you have used. The Command Centre is an AI assistant that understands your entire business. Instead of clicking through menus, you just tell it what you need in plain language.
Open it by clicking Command Centre in the sidebar or pressing Cmd+K from any screen.
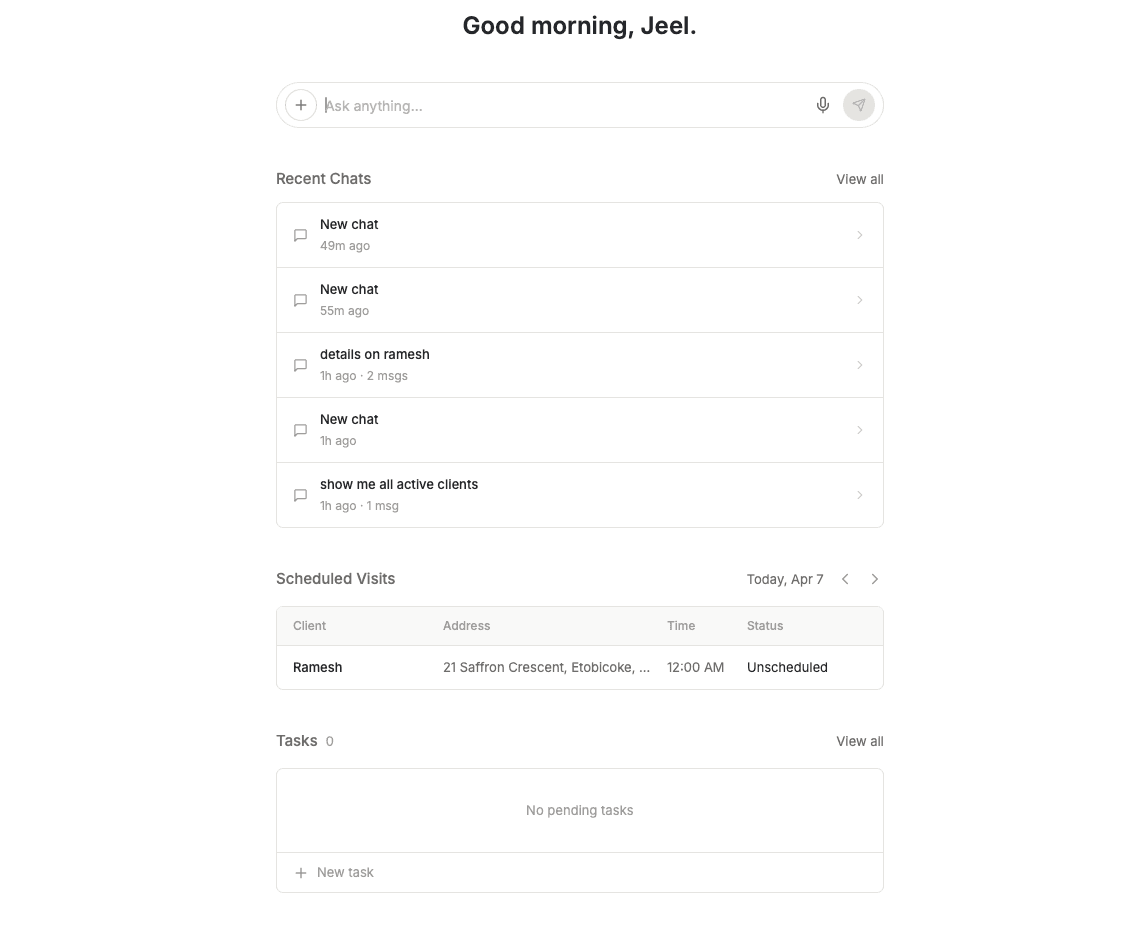
Try these to see it in action:
- "Create a job for Smith Residence tomorrow at 10am" — schedules the job, assigns it to the calendar, and notifies the team
- "Show me today's schedule" — pulls up every job and visit for the day in a clean table
- "Which invoices are overdue?" — lists unpaid invoices so you can follow up instantly
- "Find the best technician for the HVAC install on Friday" — checks availability, skills, and location to recommend the right person
The Command Centre can do everything you just set up manually — create clients, schedule jobs, send invoices, pull reports — all from a single chat. It supports 9 built-in slash commands, file attachments, and custom AI skills.
See Command Centre — AI Chat for the full guide, and AI Skills for every command you can use.
Once setup is complete, the Command Centre becomes your primary tool for day-to-day work. Most users find they rarely need to navigate through menus once they start using it.
You're ready! With these steps complete, you can start creating clients, taking requests, scheduling jobs, and sending invoices. Explore the Settings Overview to fine-tune your workspace, or check the Troubleshooting guide if you run into any issues.
FAQ's
How long does it take to set up FieldCamp?
Most businesses complete the essential setup in about 15 minutes. This covers your company profile, business schedule, email connection, payment setup via Stripe, and inviting your first team member. Adding your full product/service catalog and configuring advanced features like Workflows or Custom Objects may take additional time depending on the complexity of your business.
Do I need a credit card to set up FieldCamp?
No. FieldCamp offers a 7-day free trial of the Pro plan with no credit card required. You can complete the entire setup — company profile, integrations, team invites, and your first jobs — without entering any payment information. You'll only need a credit card when you choose a paid plan after the trial ends.
Can I set up FieldCamp on my phone?
You can access FieldCamp's web app from a mobile browser to perform basic setup tasks, but the full setup experience — especially connecting integrations, configuring business settings, and managing team roles — is best done on a desktop or laptop. Once setup is complete, your field technicians can use the FieldCamp mobile app for day-to-day job management.
What integrations should I connect first in FieldCamp?
Start with these three in order: (1) Gmail or Outlook — so customer emails flow into your FieldCamp Inbox; (2) Google Calendar or Outlook Calendar — so FieldCamp jobs sync with your existing calendar; (3) Stripe — so clients can pay invoices online. After that, connect your accounting software (QuickBooks, Xero, or Wave) if you use one. All integrations are set up in Settings → Apps & Integrations.
Related Articles
- Key Concepts — understand how Clients, Jobs, Requests, and Invoices connect
- Command Centre — manage your business through AI chat
- Settings Overview — every setting explained
- Apps and Integrations — connect Gmail, Stripe, QuickBooks, and more
- AI Skills — slash commands and custom AI skills
FieldCamp Documentation
Complete FieldCamp documentation hub — field service management, AI Dispatcher, online booking, integrations, workflow automation, and more for your business.
Key Concepts — Core Building Blocks | FieldCamp
Understand FieldCamp's core building blocks: Command Centre, Clients, Jobs, Estimates, Invoices, Calendar, Pipelines, Analytics, and AI-powered add-ons.